Tuesday, November 30, 2010

Lentil Soup

Considering the simplicity of the ingredients and actual cooking, I found this to be a worthwhile meal.  However, Alex did not seem too pleased since there is no meat in this dish.  Tough luck!  In the future if he wants meat when I'm making a veggie meal, he can take care of it himself!  Rating 6.75/10.

I got this recipe from Zoom Yummy


Ingredients
  • 1 cup of red lentils (Bob's Red Mill brand makes them- in case you are having trouble finding them)
  • 1 onion
  • 2 cloves of garlic
  • 1 (or more) large tomatoes
  • 1 chili pepper
  • 3.5 cups of water
  • 1.5 tbsp olive oil
  • .5 tsp mustard seeds
  • 1 tsp garam masala
  • 1/4 tsp turmeric
  • 3/4 tsp cumin seeds (I accidentally used ground cumin- it was fine)
  • salt to taste
  • lemon juice to taste (I used the juice from about half a lemon)


Chop up the onion, tomato, garlic, and chili pepper (leave the chili seeds in if you want some heat).
 
Cook the lentils in a pot with the 3 1/2 cups of water.  This shouldn't take too long (~6 minutes).

Heat up the olive oil in a large pan.  Add in the mustard seeds- they are going to pop!  Once they have commenced the popping then add the onion, turmeric and cumin.  After a minute or two, add in the chopped garlic.  Continuously stir!  Then add in the chopped tomato and chopped chili pepper.
 Then pour the lentils and their water into the pan.  Add in garam masala and salt (I added 1 tsp of sea salt).  Stir and let simmer for a few minutes to allow the flavors to get married. I squeezed my lemon into the soup a few minutes before serving, and boy howdy was it the perfect addition! 

Alex and I ate this just by itself, but it would be great with a side of fresh veggies.  Alex thinks that curry chicken would be great with it, so I'll probably whip this soup up when I finally get around to making that.

Pumpkin Pancakes

I managed to treat myself to these awesome pancakes from Martha Stewart this morning before I headed off to school.  It didn't use up nearly enough of my leftover pumpkin puree to make these, but at least a little bit more is gone now!  But anyway, these pancakes are fluffy, moist and ridiculously nummy!  This recipe makes enough for about four standard sized pancakes, and could feed two normal people.  Alex could eat four all by himself!  Rating 8/10.


Ingredients
  • 1 1/4 cups of flour
  • 2 tsp of baking powder
  • 1/2 tsp ground cinnamon
  • 1/2 tsp ground ginger
  • 1/4 tsp salt (you can add more)
  • 1/8 tsp ground nutmeg
  • pinch of ground cloves
  • 1 cup of milk
  • 1 egg
  • 1/4 cup of pumpkin puree + 2 tablespoons
  • 2 1/2 tsp olive oil
Combine the dry ingredients and wet ingredients in separate bowls and mix thoroughly.  Combine the wet and dry mixtures and mix until well-blended.  Cook in a PAM-ed (or buttered) pan for about 2.5 minutes over medium heat on each side, or until the edges of the pancake are done and the top starts to look a little "settled". 

Serve with maple syrup, cranberry sauce, anything!

Saturday, November 27, 2010

Pork Sandwiches

Or as my friend Sarah would call them, "BBQ sandwiches".  Many fights have been fought over what constitutes as BBQ, but I'm pretty sure that you need to be more specific when you say "we're eating BBQ".  Anyway, this meal was pretty easy.  I managed to prep everything and throw it in the slow cooker in about 30 minutes, and that counts the two times that I ran to the store across the street to get something.  I put Alex in charge of making the buns (since I had to go to work and couldn't clone myself quickly enough to bake a batch), and even though he was a little apprehensive about being in charge of something beyond stir-fry, the buns turned out great.  I ate a whole bun by itself before dinner.  And the meat smelled so amazingly-awesome that I started forking off pieces and dunking them in BBQ sauce while I waited for my fries to hurry up.  Rating 8.5/10.
This recipe is from Life's Ambrosia

Ingredients
  • 1 teaspoon chili powder
  • 1 teaspoon cumin
  • 1 teaspoon granulated garlic
  • 1/2 teaspoon fresh cracked black pepper
  • 1/2 teaspoon dried oregano
  • 1 (5 pound) bone-in pork shoulder
  • 1 medium onion
  • 3 cups beef broth
  • 2 cups water
Procedure
Combine all of the spices and rub the pork down.
Let the pork rest a bit- preferably overnight.
Chop up the onion and lay it on the bottom of the slow cooker.
Place the meat on top of the onions and fill the slow cooker with the beef broth and water.
Cook on low for 8 hours.
Scoop the meat up with a slotted spoon and encourage the meat to fall apart by pulling at it with two forks.  This step should be a breeze.
Eat the meat in a sandwich, burrito, fajita, enchilada, paleo-friendly romaine lettuce leaf, whatever works.

Pumpkin Pie

 Note- to make this recipe PALEO- omit the crust.

I had A LOT of pumpkin puree left over from my cornbread, and I promised Alex that I would make him a pie with it.  I almost changed my mind about making this pie after Alex ate FIVE slices of pie yesterday, but I wanted to make some for myself.  I chose to make this particular recipe because 1) it doesn't require making a legit pie crust and 2) the filling is "paleo" friendly (which means that it contains stuff that only paleolithic people ate- Alex is a fan of this approach to eating). 
I was pretty surprised by this recipe (mainly because it came out actually looking like pumpkin pie).  I was kind of indifferent to the pie after an hour in the fridge, but this morning I couldn't stop myself from going back for a second piece of breakfast pie.  Rating 8/10.


Crust
  • 2 cups ginger snap- I made my own using my recipe below (they may or may not have been fudged)
  • ¼ cup olive oil
  • ¼ cup maple syrup
Filling
  • 1 ½ cups of pumpkin puree
  • 3 eggs
  • 1 cup coconut milk
  • ½ cup honey
  • 1 tablespoon arrowroot starch
  • 1 teaspoon vanilla
  • 1 tablespoon pumpkin pie spice (I used a recipe here to make my own)
  • 1 teaspoon salt

Crust
Crush up the gingersnap cookies and combine with the maple syrup and olive oil.  Press into the bottom of a 9x9 pie plate (2 cups of cookies gave me enough crust to fill in the bottom of the plate, but not the sides).  If you are having problems mooshing the crust into the plate, let the crumbs soak a little bit longer in the olive oil and maple syrup.  
Filling
Combine all of the ingredients for the filling in a pretty large bowl and STIR WELL.  I would have used my stand mixer to do this, but it was dirty.  I probably would have saved a bit of time if I had, since I had issues with my arrowroot starch clumping up. 

Pour the filling into the crust.  Bake for about 50 minutes in an oven that has been preheated to 350 degrees.   Cool in the fridge (I found it best after a night in the fridge) and eat with a mound of whipped cream.


Wednesday, November 24, 2010

Pumpkin Puree

My contribution to the Thanksgiving family feast tomorrow is my pumpkin cornbread.  A few weeks ago  I noticed that none of the grocery stores that I shop at had any pie pumpkins out.  I was horrified!  It was as if all of the pie pumpkins had been bought up by Libby's and processed so that the 2010 pumpkin shortage wouldn't reoccur.  I prematurely decided that I was defeated, and picked up a can of pumpkin.  However, last night I had a hankering for some Neapolitan pizza and didn't have any tomatoes.  I chose to shop at a store that I always forget exists, mainly because they specialize in cheese.   As I walked up to the storefront (I had walked all the way there, assuming that it wouldn't take as long as it did...), I noticed that there was a HUGE CRATE FULL OF PIE PUMPKINS.  I almost died.  I also almost bought 5 so that I could make a ton of puree and freeze it, but then I realized that there was no way that I was going to carry 5 pumpkins + other purchases home in the cold.  So... this Thanksgiving I am thankful that I was able to purchase a legit pumpkin, and not have to feed my family Libbys.'s.  I mean, if I was busy actually doing homework or making more than just my pumpkin cornbread I would probably use canned pumpkin, but I like avoiding doing my term paper way too much to not spend time actually cutting up/gutting/baking/scooping out pumpkin.

Ingredients:
Pie pumpkin!

Procedure:
Preheat oven to 350 degrees.
Cut off the stem and slice the pumpkin in half.

Place pumpkin halves face-down on a cookie sheet covered with tin foil.
Cover the pumpkin halves with tin foil (this helps with evenly cooking the pumpkin since there is a huge gaping hole where the stem used to be (at least the way I cut the pumpkin since I'm too weak to cut off the stem in one go)).
Bake for an hour and a half.
Let the pumpkin cool and then scoop out the seeds.  This step can be done before the pumpkin is baked, but I find it easier to remove the seeds and guts post-baking.  Save the seeds if you like them, but I just throw them away.  Scoop out the pumpkin flesh and mash it to smithereens or use a mixer.  My pumpkin remains stringy because I don't have any fancy equipment to completely puree it, but I kind of like the added texture in my cornbread.  I'm sure once I get a food processor or food mill I will change my mind, but that has to wait until I go home for Christmas I nab my mom's.

Tuesday, November 23, 2010

Gingersnap Cookies


Since Alex and I are planning on moving to China at the end of this summer, I'm really making an effort to use up my spices. It doesn't help that the recipes that I'm using to use up all of these spices call for other spices, so I just end up buying more spices anyway! Tonight I was able to make these cookies without having to buy any extra spices, so I was pretty ecstatic about that. No lie. However, I didn't have any ground cloves. I went all mega-domestic and ground my own. This was accomplished by mashing whole cloves with a teaspoon, then rolling the cloves with a rolling pin, and then repeating the mashing with the teaspoon. I NEED a mortar and pestle. I need a lot of things that I don't have space for though =/. Anyway, cookies aren't usually on my list of things to make. Ever. I don't think that I have baked any sweets since I was scarred in high school. I spent hours and hours baking and decorating a cake for some guy, and he had the nerve to tell me that it wasn't moist enough. However, these cookies really spoke to me (mainly because I have a lot of molasses).  Rating 9/10.

Ingredients
  • 3/4 cup unbleached all purpose flour
  • 1/4 cup whole wheat pastry flour
  • 1/4 cup brown sugar
  • 1/2 tsp ground cloves
  • 1/2 tsp ground cinnamon
  • 1 tsp baking soda
  • pinch of salt
  • 1/2 cup molasses
  • 1/4 cup canola oil
  • 1/2 tsp vanilla extract
  • 1 egg
Procedure
Combine dry ingredients in mixer bowl.
Combine the wet ingredients in a separate bowl.
Combine them both and mix in a mix stand with the paddle attachment.
Cover (a pot lid fits on my kitchenaid stand bowl just fine) and place in the freezer for an hour- or until firm.
Cover a cookie sheet with tin foil.  Spray hands with PAM and shape the dough into sixteen 1 inch balls and place on cookie sheet.
Preheat oven to 350 degrees and bake for 12 minutes- or until done.

Let cool, dunk in milk.

Update:  These may be the best cookies that I have ever had.  Not only do they taste great without butter, but there is really no need for sugar on these bad boys at all.  I think that the small amount of sugar that I did sprinkle on top added some texture, but that is it.  I am having a hard time now scarfing all of them down at once, and I almost started crying when I tucked some into Alex's school bag (because I'm a greedy little gremlin.)

Sunday, November 21, 2010

Noodle Soup

When I was in China I ate noodle soup probably 3-4 times a week.  It took me a while to get used to eating it for breakfast, but it was usually my only breakfast option while we were in Beijing.  During that time all I could think about was how much I missed eating cereal and crumpets, but now I look back on my noodle soup and dumpling breakfasts with fond memories.  Anyway, since coming back to the states I have been eating a lot of pho, since there aren't any great Chinese places around.  I decided to make my own, and I started with beef.  I'm going to try making a chicken version in the future, since I know that my sister will actually eat chicken pho.  I found an inauthentic recipe (I didn't want to buy oxtail or any other exotic ingredients) online at Life's Ambrosia
Considering the simplicity of the ingredients (which essentially made seasoned beef broth with noodles) , it was pretty darn good.  Rating 5.5/10.

Ingredients
  • 4 cups beef broth (this is the average size carton of broth)
  • 1 medium yellow onion, cut in half, one half thinly sliced, leave the other half whole
  • 2 cloves garlic
  • 1 teaspoon whole cloves (making this meal made me realize that I have doubles of A LOT of spices, cloves included)
  • 1 cinnamon stick
  • 1 teaspoon olive oil
  • 1 pound round steak, thinly sliced
  • fresh cracked pepper and kosher salt
  • 1 (8.8) ounce package of thin rice noodles
  • bean sprouts
  • 1 – 2 jalapenos, sliced (I forgot to add this, and it probably would have had that extra kick that I noticed was missing)
  • cilantro, chopped
  • sriracha and hoisin sauce (optional)
Procedure
Put garlic, unsliced onion half, cloves, cinnamon stick and beef broth in a pan and bring to a boil.  Cover and lower to a simmer, and let it cook for an hour.  This is probably one of the best aromas that I have ever smelled.  With about ten minutes left on the timer, start cooking the rice noodles according to the package instructions.  Drain the noodles and combine with the broth.  Allow the noodles to truly become married with the flavor of the broth, which will take about 5-10 minutes, otherwise the noodles will taste a bit bland.  Season with salt and pepper to taste, and top with sliced cooked beef, sliced onion, cilantro, bean sprouts, jalapeno, and sriracha and hoisin sauce.  This recipe makes enough for about 2 people.


Saturday, November 20, 2010

Spicy Roast Beef

I don't like to remake entree recipes often, unless they are really really basic (think tex-mex or stir fry).  I think that if I make them too often (~4 times a year), then I will tire of them.  I have a history of endlessly eating and tiring of food... Smacks cereal, macaroni and cheese, and other foods that I've repressed in order to prevent myself from crying every time I walk past them in the store.  So far I've only been able to regain my will to eat the blueberry cranberry bread from the Breadsmith, a loaf of which I can devour in a sitting.  Good thing I'm never actually in town on the days that it is made, otherwise I would probably have sausage fingers from all of the carbs.  Anyway, moving away from bread... Today I made a roast, the same roast that I made about a month ago!  Alex and I were debating whether or not to go to Outback (which I think we went to like four times in the last two months... yikes!)  I won out, and got to make a roast.  The crushed pepper really added an nontraditional kick to this roast.  It didn't help that I apparently didn't mix the spices well enough, so occasionally there would be bite of very ferocious tasting beef.  We had our friend Sarah come over for dinner, even though the poor girl wasn't fed for like two hours because we didn't get back from the grocery store until much later than anticipated.  Alex really liked the roast, I really liked the roast, and Sarah will be coming back for dinner again.  Rating 9.5/10.

This recipe is  adapted from Food People Want


Ingredients

  • 1.5 lb boneless eye-round roast
  • 1 teaspoon freshly ground black pepper
  • 2 teaspoons dried oregano
  • 2 teaspoons dried basil
  • 1/2 teaspoons ground red pepper
  • 3 cloves of garlic, finely chopped to a paste.  Or 1 tsp garlic paste.
  • Salt
  • Olive oil
Instructions

Rub salt all over the roast the day before (or in my case- two hours before) you plan on baking it for dinner.  Cover and wrap tightly in saran wrap, and place in the fridge.
Prior to baking the roast, preheat the oven to 250 degrees.
Rub olive oil over roast and then mix up the spices with the garlic and repeat the rubdown.
In an olive-oiled pan large enough to hold the roast, brown every side (for about two minutes).
Place the roast on a rack that is on top of a cookie sheet.  Line the sheet with tin foil to avoid any unnecessary dish washing *shudder*.
Bake in the oven for an hour and twenty minutes at 250.  Turn the stove off and leave the roast in for another 25-30 minutes (or until the roast reaches 130-140 degrees).
Slice, consume.

Wednesday, November 17, 2010

Beef Bulgogi

This is one of the first recipes that I ever made, aside from fajitas.  It is from the Great Food Fast (from Martha Stewart's team of kitchen minions) cookbook, which was what Alex bought for me a little less than two years ago when I first expressed an interest in cooking.  I made a few meals out of it and most were delicious, and then I fell back into the routine of eating out at restaurants again.  Naturally there are a few flops in this book (and too many fish recipes, gag), but this is truly one of the most scrumptious recipes that I've prepared, ever. 

Alex wanted to veggie it to smithereens, and so I obliged and added some extra stuff.  In the future I'll probably be leaving out the added veggies, as I feel that the veggies included in the original recipe shouldn't have to compete with carrots and tomatoes to bring out the flavor of the marinade.  Rating 8/10 (when excluding the red ingredients- including them makes it more like 6.5/10).

Ingredients *those listed in red are not included in the original recipe, and should probably not be in this one either.
  • 1 lb rib-eye steak- steak substitutions here really detract from the overall awesomeness of this meal, so if you have the money then spend it!
  • 1/4 cup soy sauce
  • 1 tbsp hot chile sesame oil- if you can't find this then toasted sesame oil with a sprinkle of red pepper flakes will do
  • 2 tbsp dark brown sugar
  • 6 garlic cloves- minced
  • 1 tbsp peeled and finely grated ginger
  • 2 red onions- cut into wedges
  • 1 green bell pepper- remove seeds and ribs and slice into 1/2 inch strips
  • vegetable or canola oil
  • boston lettuce leaves for wraps
  • carrots
  • tomatoes
  • bean sprouts 

Instructions
Start cooking brown rice right away according to the package.  This can take up to 45 minutes!  White rice can be cooked right away and then set aside once it has cooked, or it can be started later in the process.
Throw the meat in the freezer for 20 minutes, this will make slicing it into thin strips easier.

Cut up the green pepper and onion.
Combine the soy sauce, hot chile sesame oil, brown sugar, minced garlic, grated ginger in a bowl.
Pour half of the marinade over the vegetables, reserve the rest for marinating the meat.

Slice the beef across the grain into strips.  Marinate for 10-15 minutes with the remaining marinade.
Once the meat has been marinating for about 10 minutes, cook the vegetables in a wok with about two tsp of oil.
Once cooked, set the vegetables aside and use a paper towel to wipe out the wok


Cook the meat until it has been browned, then return the vegetables to the wok.  At this point I added the bean sprouts, carrot shreds, and tomato wedges to the pan.
Cook for a minute or two to reheat the vegetables.


Serve over rice or in a lettuce leaf. 


Monday, November 15, 2010

Soft whole wheat sandwich bread

Lately my culinary adventures have all been... unpleasant.  Which has put me in a depression that could smother out an emo kid's emotional distress.  I've made "gourmet macaroni", buffalo chicken burgers, and hummus.  All of which have probably made Alex start to question what I put in front of him at the dinner table.  The failures hurt even more because they all required more effort than I'm used to exerting.  My depression remedy?  Bread.  I mainly made this because I just got Healthy Bread in Five Minutes a Day  and wanted to dive in.  I also have a ridiculous amount of flour in my pantry right now, and would prefer to get it down to a manageable amount.  I made a loaf of bread and two burger buns with this recipe, and it is truly nom-nom worthy. 

I cut the recipe in half, so that I could remain sane (the original recipe created a boatload of bread).

Ingredients
  • 2 1/2 cups whole wheat flour
  • 1 1/4 cups unbleached all-purpose flour
  • 3/4 tbsp yeast
  • 1 tsp kosher salt
  • 1/8 cup vital wheat gluten
  • 1 1/4 cups lukewarm water
  • 1/4 cup honey
  • 3 eggs
  • 1/3 cup canola oil
Mix together the dry ingredients in stand mixer.
Mix together the water, honey, eggs, and oil and add it to the dry mixture. 
Cover with saran wrap and let it rest at room temp for 2 hours. 
You can use it right away, or cover it and put it in the fridge.  It can be used over the next 5 days.  If you don't use the dough immediately it will need to rest at room temperature for about 90 minutes after being refrigerated.

Baking instructions
Preheat oven to 350 degrees.  Coat a sticky (vs. non-stick) loaf pan with Pam.  I don't use nonstick cookware or bakeware, because I'm paranoid. 
Coat the dough with flour so that you can form it into a ball.  Once you have achieved the perfect dough ball (ha), stretch it out into an oval that is as long as the loaf pan. 
Sprinkle with oats, sesame seeds, whatever.

Place the bread in the loaf pan and bake for about 50 minutes.  The time required really depends on the size of the pan used.
Remove, cool, chow down.


Hamburger buns
Instructions

From the original dough batch tug off as many bun-sized wads of dough as desired.  Form into a circle (add flour if necessary), and place on a cookie sheet that is lined with parchment paper.  Cover with saran wrap, press down on the buns, and let sit for 40ish minutes.  REMOVE SARAH WRAP (I forgot for a few minutes...), and sprinkle sesame seeds on top.  Bake in an oven preheated to 350 for about 20 minutes. 

Friday, November 12, 2010

Animal Crackers

The other day I stumbled across How Sweet It Is, and proceeded to spend way too much time bookmarking things that I want to make really really soon.  When I saw the animal crackers, I knew that I needed to devour some immediately.  Finding the cookie cutters turned out to be a real big hassle, but I was determined to not pay shipping and handling. I abandoned Alex in Game Stop, and then drove like crazy to every home goodsy store in the area trying to find these silly cutters.  Eventually I encountered them (at Joann Fabric), and almost accidentally walked out of the store without paying because I was so frazzled from the whole ordeal. These are good considering that they are one of the healthier recipes that I found for animal crackers, but I'm still on the hunt for a better one.

Ingredients
  • 1/2 cup oats
  • 1/4 cup all-purpose flour
  • 1/2 cup whole wheat pastry flour
  • 1/4 teaspoon salt
  • 1/4 teaspoon baking soda
  • 1 tablespoon honey
  • 1 teaspoon vanilla extract
  • 1/4 cup butter, softened
  • 4 tablespoons buttermilk (I used 4 tbsp of skim milk mixed with 1/4 tsp vinegar)
  • Natural cane sugar
Grind up the oats, I used my awful and noisy blender.
I then dumped the ground oats into my mixer bowl, and added all of the other dry ingredients.
Once they are all blended together, add in the vanilla extract, honey, butter, and buttermilk separately and blend until that ingredient is fully incorporated into the mixture. 
Cover the mixer bowl and place in the fridge for a while (~30 minutes).
Sprinkle a pastry board with flour and roll out the dough to a relatively thin layer.   Add flour to the top of the dough if it sticks to the rolling pin.
Then stamp, stamp, stamp!  Make as many animals/boats as possible, then peel out the excess dough, roll it out, and make even more animals/boats!  Sprinkle/pound some natural cane sugar into the animals. 
Bake in the oven at 400 degrees for about five minutes.  I used my pizza stone to bake the crackers, even though my stone is broken in half :(.

Consume.

Kale Pesto Pasta

The last 24 hours have been AMAZING.  I got to hang out with the family and eat a bunch of cookies, got a new job (bye bye, deli!), finally got the bread cook book that I ordered 3 weeks ago, and hit up Penzey's Spices and bought some goodies.  Holy wow at Penzey's. I want to completely replace all of my spices with Penzey's, if not for the superior quality but for the cute containers. Moving on...

I looove pesto.  I once had a friend who worked at Noodles &Company that would give me a meal for about one buck.  Needless to say, I ate at Noodles ALL OF THE TIME.  My go-to meal at Noodles has always been the pesto cavatappi, but these days I have tried to diversify what I get.  God forbid I ever get sick of pesto.  Anyway, I decided that I wanted a healthier and home made pesto sauce for some pasta, and this is what I came up with. I originally tried to grind up the kale in a whole bunch of different methods, but in the end I had to use my dying blender.  Serve over spaghetti squash for a paleo-friendly recipe!

Ingredients
  • 8-10 leaves of kale (much cheaper than basil)
  • 1/4 cup extra virgin olive oil
  • feta cheese
  • 2 peeled cloves of garlic
  • salt and pepper, if desired
 Boil some water in a pot that is large enough to boil a whole piece of kale in it and to cook the amount of pasta that you want.  Add in the garlic and let the garlic boil for a few minutes.  Add in the kale piece by piece, and allow to soak for about 14 seconds (or long enough for it to mush down so that it isn't crispy anymore).  Remove the kale with a slotted spoon and place in a blender or food processor.  Once all of the kale has been boiled, add the garlic into the blender as well.  Add about 1/4 cup of the extra virgin olive oil, 1 tablespoon of cheese, and salt and pepper (I didn't add any).  Pulse or blend until everything has been torn to smithereens.  Cook pasta in the pot for recommended amount of time while this is going down.  Drain pasta, toss it in the pesto sauce, and top with more cheese. I ended up adding a lot of cheese throughout the devouring-process, I blame it on living in Wisconsin.

Tuesday, November 9, 2010

Neapolitan Pizza

I adore Neapolitan-style pizza.  My first taste of it was in high school when a Punch Pizza came to town, and practically every time I return home I make a stop there.  As I have gotten more familiar with Madison, I have found several Neapolitan pizzerias around.  For some reason nobody is as bonkers over this pizza as I am, so I don't get many chances to hit up any of these awesome eateries :(.

Luckily I found a new food blog yesterday, and was inspired when I saw that there was a Neapolitan dough recipe.  I quickly started fantasizing about this pizza, and started the prep work when I got home from the store today.  This dough should be made the day before, but I couldn't wait so I only let it sit for about four hours (and it was awesome).  I'm pretty sure that this is the best pizza dough that I have ever made, which has cut my pizza crust quest rather short.  I'm planning on making some whole-wheat modifications, so I can justify eating it every day. 

This recipe makes enough dough for several pizzas.  The exact amount varies on how large you make them, but it can make up to six.

  • 4 1/2 cups bread flour, chilled
  • 1 3/4  teaspoons salt
  • 1 teaspoon  instant yeast
  • 1/4 cup olive oil
  • 1 3/4 cups water, ice cold
  • cornmeal, for the bottom of the pizza
Combine the dry ingredients in mixer with the paddle.  Add in the olive oil and  water, and mix until all of the ingredients are combined.  At this point switch out the paddle for the dough hook, and continue to mix on a medium setting for about 5 minutes.  The dough should not stick to the sides, but still stick to the bottom of the bowl.  Side note- I think that this dough feels so great that I would pet it if I didn't have cats that would appreciate the attention more.

On a tray or cutting board shape the dough so that you can easily cut it up into the desired amount of separate pizzas (I made four).  Shape each chunk of dough into a ball, brush with olive oil, and place each dough ball in its own freezer bag.  I threw two into the freezer for future use, and placed two in the fridge for immediate usage.

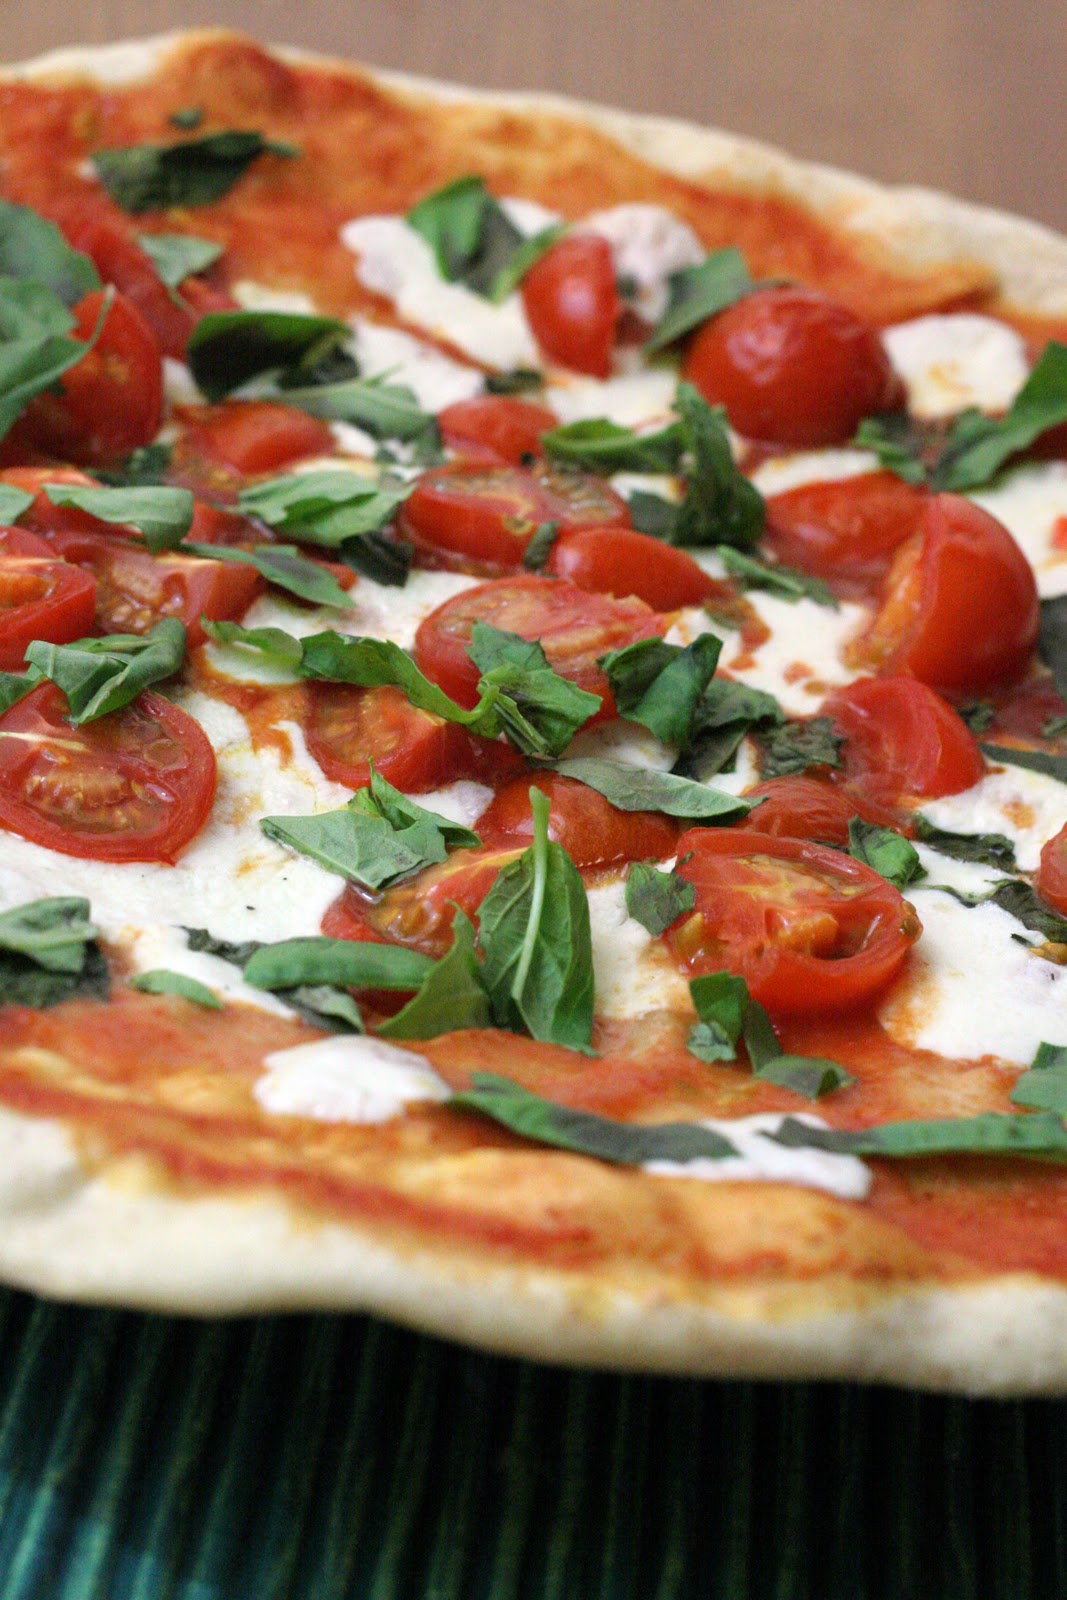
Allow the dough to rest in the refrigerator overnight.  Take the dough out two hours before use and allow it to come to room  temperature.  About half an hour before preparing the pizza turn your oven to its highest setting (mine tops out at 500 degrees), and make sure that your pizza stone is placed in the oven.  Shape the dough either by stretching it over your knuckles or with a rolling pin (I used the pin).  Place it on a pizza peel that has a layer of cornmeal already spread out on it, and place the desired toppings on the pizza.  LESS IS MORE.  This is not a chance to make a meat-lovers or garbage pizza, this is a chance to experience the fine flavors of just a few ingredients.  I never ever stray from my basic margherita toppings, because I am a creature of habit.  So this is what I put on my pizza
  • my homemade pizza sauce
  • slices of fresh mozzarella cheese (the good stuff, not the mozzarella that you put on sandwiches or your Americanized pizza)
  • shredded basil
  • another option is to add thin slices of roma tomatoes.  I used all of mine up in the pizza sauce, so I went without

When the pizza is prepared, it makes it much easier if you use a pizza peel to transfer it to the pizza stone.  I do not have a pizza peel, so I did my best with a spatula and spare hand (and semi-failed during the transition).  The pizza stone should be on the middle rack of the oven.  Bake the pizza for about 7-9 minutes, or until the toppings are done and the crust feels substantial. Remove from oven and allow to cool for a minute or two, if you can manage to wait.

The crust isn't very sturdy, so this is definitely a knife and fork kind of pizza!

For those without a stand mixer or pizza stone, check out the link above for instructions on how to prepare this.


Pizza Sauce

I have a couple of jars of pizza sauce sitting in my pantry, but today I wanted to be lazy.  With regards to school that is.  So I decided that I would make my own pizza sauce, and headed to the store after class to pick up some sauce essentials.  I'm not sure if this actually saves any money in the long run, but it is definitely much more satisfying (and time consuming).  Aside from slicing the tomatoes up, it is pretty simple and I can't believe that it never occurred to me to make this before.  I went with a recipe from Dawn's Recipes, and tripled it since I bought quite a bit of tomatoes.  I modified the amount used of some of the ingredients, just to make it a little bit healthier.

Ingredients

  • 3 cups of crushed tomatoes (I made my own)
  • 2 tbsp olive oil
  • 1 1/2 tsp garlic, or 3 cloves chopped
    1/3 tsp dried oregano, or 1 tsp fresh chopped oregano
  • 2 pinches of sugar
  • 1 pinch of dried basil
  • 1/4 tsp sea salt

Combine everything together in a saucepan and simmer until the sauce thickens up a bit.  Taste, and add more/different spices if preferred.  I'm planning on eating my sauce all up within the next two days, so I didn't actually go through the canning process, but I'm storing the sauce in jars anyway! 


Saturday, November 6, 2010

Avocado Steak

I found this recipe at Lifes Ambrosia.  I figured that it was worth trying.  I mean, I like steak and I like avocados.  IT WAS GREAT.  I've never seen Alex light up so much, so that was definitely worth all of the "hard work".

The Ingredients: (LA's recipe called for onion powder, but I didn't have any and it was spectacular without it)


  • 2 pieces of steak
  • 1 1/4 teaspoon garlic powder
  • 1 1/4 teaspoon ground cumin
  • 1/2 teaspoon kosher salt
  • 1/4 teaspoon chili powder
  • 1 avocado
  • 1/3 cup chopped cilantro
  • 2 cloves garlic
  • 1 tablespoon red wine vinegar (substitute lemon juice for a paleo-friendly recipe)
  • 1 1/2 tablespoons extra virgin olive oil
  • 1 pinch kosher salt
  • juice from 1 lime
What to do
Mix together garlic powder, ground cumin, 1/2 tsp kosher salt, and chili powder


Rub it on your chunks of meat.


I then set the meat aside in the fridge for about an hour.  I took this time to make the avocado sauce (and do some pilates).

For the sauce:
Peel the avocado, take out the pit, and chop it into pieces.


Blend/process all of the avocado sauce ingredients together.
This sauce was delicious, and I'm fairly certain it is the same sauce that our favorite Peruvian restaurant serves as a dip to go with their roasted corn kernels.  


Grill or pan-grill your steaks until they have some pink in the middle.
Serve with the avocado sauce spread over the top.


I found this recipe to go very well with the asparagus recipe that I provided below and sliced mango.  Alex has requested this to be made on a monthly basis, we'll see about that...

Everything prepared provided enough for two meals.  Modify as needed.

Basic Delicious Asparagus

Asparagus used to be one of the vegetables that I would avoid like the plague.  I have distinct memories of sitting in my spot at the dinner table crammed against the wall refusing to eat it, being told that it was too good for me anyway, and then feeling proud of myself for not having to eat a foreign green stick.  Then I actually tried asparagus a few years ago, during the much looked forward to post-teen era.  NUM.  Anyway, I thought that making asparagus would be a big ordeal, and never considered making it for myself.  Until I realized that asparagus is the probably one of the easiest vegetables to prepare.  I haven't deviated much from my basic recipe, which consists of asparagus, sea salt, olive oil and lemon.  Honestly, I haven't found much need to.  Yet.


Ingredients:
1 bunch of asparagus
extra virgin olive oil
sea salt
lemon juice

What you need to do:
Preheat oven to 450 degrees
Line a pan with tin foil
Coat asparagus with olive oil and arrange the stalks.  Use a brush (or hands) to apply oil.
Sprinkle sea salt over the stalks
Squirt a small amount of lemon juice over the stalk arrangement.

Bake for ten minutes.
Devour.

Wednesday, November 3, 2010

Tom's Famous Chili

Or what I like to consider "Fuhget Abaout It!" Chili.  Seriously, aside from browning some hamburger with diced onion and garlic all that you need to do is dump the ingredients in a big pot and walk away for half an hour.  This recipe is from one of my mamacita's coworkers.  I've made it for Alex and myself on a number of occasions since it is so simple, and I generally have most of the ingredients.  Is it the most delicious and gourmet chili version?  No.  But it is quick, easy, and should please most palates.  I'm currently on the hunt for a more mature chili recipe, but this will do until then.

Without further adieu,

Ingredients
Two cans of chili beans (I get one mild and one hot, because my tongue is a baby)
3/4 cup taco sauce (I use mild, once again big baby)
1 28 oz can of stewed tomatoes
1 small can tomato paste (I was too overwhelmed by all things tomato, so I opted for tomato sauce.  No big difference)
15.5 oz of salsa (I forgot to buy it before I took the picture!)
1 can of beef broth
1 packet of taco seasoning (I only used about half of it, trying to cut down on Na!)
1 lb ground beef (or chunks of cooked chicken.  I don't have a food processor, and was not in the mood for slicing up meat)
1 clove garlic- cut up into smithereens/grated
about 1 small onion- diced

I managed to find most of my processed foods in low-Na options,yippee!

Instructions
Brown the hamburger with the onion and garlic.


While the hamburger, onion, and garlic are romancing one another, dump everything else into your big pot.  Once the hamburger is browned, dump it into the pot as well.  Don't pull a me and forget to stock up on salsa before hand, only to make your fiance run to the convenience store to pick up an overpriced jar!


Cook for about half an hour, or even 40ish minutes if you lose track of time.  Serve with your favorite chili toppings!


Tuesday, November 2, 2010

Pumpkin Cornbread

I despise cornbread.  I think that I associate it with bible camp when I was young.  Bible camp, for the most part, was super fun.  We dressed up in little Jesusy  robes and were issued tin-foil money (I found the $ stash, and became pretty tinfoil-rich), which we would then use to go around and buy cool things like dreydels and food.  The downside?  The only food that they had was bread!  Most of the bread was delicious (I have a weird thing for artisan bread), but for some reason there was always cornbread.   Yuck.  Anyway, I found this recipe over at Sugarcrafter while I was looking for pumpkin recipes.  I made it about two weeks ago for the very first time, assumed that it would be so-so, and quickly snarfed it down.  I was thrilled when Alex asked me to make it again since it uses up my sugar pumpkin that I was too lazy to carve in hort. lab, and I know it will go great with dinner tomorrow.

What you will need:
  • 1 cup flour
  • 1 Tbsp baking powder
  • 1 tsp kosher salt
  • 1/2 tsp ground cinnamon
  • 1/4 tsp ground nutmeg
  • 1/2 cup brown sugar
  • 1 cup cornmeal
  • 2 eggs
  • 1 cup pumpkin purée
  • 1/4 cup olive oil
  • 1 Tbsp molasses
Prepare and combine all of the dry goods together and mix thoroughly.


Combine the wet ingredients and mix.
Mix the dry with the wet...
 Place in an 8x8 baking dish

Cook at 400 degrees for 30 minutes.  Try to let cool as long as you can manage to resist gobbling a piece up.  Last time I managed to make this cornbread last for a week, and the last bite was just as moist and delicious as the first.

Monday, November 1, 2010

Buffalo chicken lettuce wraps

My man and I love to eat buffalo wings.  Whenever we go out to an establishment like Buffalo Wild Wings or Quaker Steak and Lube, we both always settle on wings smothered in hot sauce.  We differ only in which sauce we get on the side (I'm a blue cheeser).  While we aren't exactly on a diet diet, we have been trying really hard to eat healthier.  This meal was inspired by the one unusual meal choice that I made at Quaker Steak, which was a chicken wrap (smothered in hot sauce).  Alex is on a "carbs=bad" diet, so I substituted the tortilla with lettuce leaves, and I left out cheese and dressings to make it even healthier.  This meal was also eaten with quite a bit more vegetables than the inspiration wrap, which made us both extremely pleased. It was also super quick to prepare, which worked out quite well since Alex was able to help me cut up the chicken, wait for dinner to be done, eat, and get to a tutoring session in about half an hour.  This meal is MESSY! So it is best to have it when you are with those who will love you, even if you are smothered in sauce.


The Ingredients
Three skinless chicken breasts- cut into strips
1/3 cup hot buffalo sauce (I used Frank's)
1 tsp garlic powder
1 stick of celery- diced
1 tomato- diced
"matchstix" carrots- or about 1 large carrot chopped into smithereens
1 bell pepper- diced or cut into thin strips
1 head of lettuce
Canola oil

Start by seasoning the chicken with the 1 tsp of garlic powder and pour on the hot sauce.  Let it sit in the refrigerator for about 30 minutes.

Heat up the oil in a wok (I used canola).  Add in chicken.  Cook until all of the chicken is cooked through.  Add more hot buffalo sauce   Fill the lettuce leaves with the chicken and vegetables, and have plenty of napkins for all of the juice that will more than likely spill down your chin.

I used relatively lightweight chicken breasts (saving $ where i can!) and this recipe made enough for about two people, without completely filling us up.  I would recommend upping the amount of chicken per person if this dish is to be eaten by itself.

For a less messy alternative, use tortillas.  For cheese lovers, add shredded cheddar.