I have a diet FULL of variety. Some days I do paleo, some days just gluten-free, and more often than not I carbo-load even though I'm not entering into any marathons anytime soon. Incorporating spaghetti squash into my diet is a new way for me to satisfy my cravings for pasta without having the post-pasta guilt trip. One cup of cooked spaghetti squash contains about 42 calories, whereas pasta contains over 200 calories per cup. Aside from the longer time commitment to cook a spaghetti squash, the health benefits make this a no-brainer.
I slow-cooked one of my favorite meals to serve mixed in with the squash- and IT'S INCREDIBLE. I've been eating the leftovers for lunch now for a few days, and I'm thrilled to report that spaghetti squash microwaves much better than pasta does.
Santa Fe Chicken recipe adapted from Skinny Taste
4 boneless chicken breasts
14.4 oz can diced tomatoes
14.4 oz chicken broth (I filled the tomato can with water as a measuring tool and mixed in some Better than Bouillon)
2 cups of cooked pinto beans or black beans
2 cups of frozen corn
1 tsp garlic powder
1 tsp onion powder
1 tsp cayenne pepper
1 tsp cumin
Salt and pepper to taste
Optional garnish: cilantro and diced green onion
Mix together all of the ingredients and set the chicken on top.
Slow cook for around 4-5 hours on high or 8 hours on low.
One hour before serving shred the chicken, adjust the spice and salt, and start cooking the spaghetti squash.
Preheat the oven to 375 degrees.
Wash and dry the spaghetti squash.
Cut it in half, remove the seeds with a large spoon, and place in a large glass casserole dish or in separate pie plates.
Bake for 40 minutes to an hour.
Remove from an oven and use a fork to separate the ribbons of squash from the skin. If the squash isn't easy to separate place it back in the oven for an additional 5-10 minutes or until it doesn't resist.
Serve the two together- and savor every bite because it is delicious!!
Tuesday, October 16, 2012
Wednesday, August 29, 2012
Balsamic Pork Tenderloin
Contrary to popular belief, we have been cooking in this household! We've just been taking advantage of our grill and most of our recipes have been meat seasoned with salt, black pepper, and red pepper flakes with a veggie side. Anyway, this recipe was worth sharing due to its deliciousosity and its novelty in our household- I don't think that I've ever had pork tenderloin before?
Recipe adapted from Kitchen Confidante
5 tsp minced garlic
2 tbsp balsamic vinegar
2 1/2 tsp kosher salt
1/2 tsp pepper
2 tbsp olive oil
2 pork tenderloins
Stir together all the ingredients (except for the pork) to create a paste. Coat each pork tenderloin with the paste and allow to marinate for at least one hour- preferably 24 hours.
Preheat grill to medium high heat and grill each of the four sides for 5 minutes. The internal temperature should be 160 degrees, if it isn't keep on grilling until it reaches that point.
Let the tenderloins rest for ~5-10 minutes before slicing.
Recipe adapted from Kitchen Confidante
5 tsp minced garlic
2 tbsp balsamic vinegar
2 1/2 tsp kosher salt
1/2 tsp pepper
2 tbsp olive oil
2 pork tenderloins
Stir together all the ingredients (except for the pork) to create a paste. Coat each pork tenderloin with the paste and allow to marinate for at least one hour- preferably 24 hours.
Preheat grill to medium high heat and grill each of the four sides for 5 minutes. The internal temperature should be 160 degrees, if it isn't keep on grilling until it reaches that point.
Let the tenderloins rest for ~5-10 minutes before slicing.
Tuesday, July 3, 2012
Thai Steak Salad
Being married is great, for some reason food has been tasting better ever since the wedding. That's not the only reason of course, but this is a food blog and I won't go off with some ode to marriage here. Alex and I chose to get married out in the Rocky Mountains at the Estes Park YMCA. People always asked me why this was where we chose, and I didn't really have a good answer for them. The first question was always if I was from there- pfft I wish! I have only been there once about ten years ago, and Alex had never even spent any time in Colorado before. I just knew that this is where it was going to take place, and luckily Alex is a great guy and went along with me. I didn't get that feeling with any place in the midwest, so I apologize to the midwesterners who had to trek out to Colorado. I hope that you had a great time- we enjoyed you and were glad to give you an excuse for a vacation! I'll share some more wedding food related deets before I actually tackle the recipe.
Catering was one of the most stressful factors of getting married in a place where it isn't terribly practical to drive out there to do a tasting when you live 16 hours away. Our cupcake lady disappeared off of the face of the planet a few days before the wedding. Seriously, she wasn't picking up her phone and this was made worse by the fact that her website had vanished- I almost checked the obits. I didn't know whether or not to be relieved that we hadn't paid her in full yet or in panic mode because we didn't send in the remaining balance by her due date and what if she was still alive and wouldn't make our cupcakes because of this??
Anyway, turns out that she was just flooded and her server was changing. I'm glad to say that Costco cake, while quite tasty, was not served at our wedding. Our cupcakes were pretty good, not as great as my chocolate banana muffins but some things cannot be helped. The flavors were: Red velvet with chocolate ganache filling and cream cheese frosting, chocolate with raspberry filling and chocolate buttercream filling, and vanilla with blackberry cream cheese frosting. I ate one of each for breakfast the next day. I am very upset at myself for letting someone walk off with the leftover cupcakes that morning- in hindsight I would have snatched some just because I would have appreciated them more without overactive bride brain.
The overlooming stress factor was that we had zero choice in catering, the YMCA was strict in providing their own food. It was pretty decent, but the prime roast was great. If you attended the wedding and ate other stuff and thought that it was just so-so, it isn't my fault that you didn't have the roast!
Oh and just to go on a bridezilla tangent since I was a pretty level-headed bride considering all of the stuff that I couldn't control, if you RSVP yes to a wedding please make sure that you can actually come. I know that it isn't life-shattering if you bow out a week before the wedding, but a head count is usually required by vendors weeks before the wedding, and while they are more than accommodating if your guest #s go up, I'm sad to say that they will not let you lower your head count if people can't come anymore. I'm mostly sad because of all of the delicious food that went unenjoyed. Scolding over.
Anyway, for our honeymoon we camped in the Rocky Mountain National Park for three nights. We had some meals that consisted of cold brats and hot dogs since the western states are all ablaze right now and there were 0 fires allowed with the penalty of ranger fury, and some pretty incredible meals that didn't stray far from our usual price points. I never would have thought that family run Thai and Nepalese restaurants in a touristy town would be the culinary highlight of our trip. On our return voyage we finally had a campfire at the Wind Cave National Park, but then a fire ban went into effect at midnight. It is dry out there!
We came back a day early since the main road in the RMNP was under construction and made getting places a real pain in the butt. In hindsight I wish that we had camped out for another night and just dealt with the construction, but we both enjoyed the mountains so much that there are plans in the next couple of years to return out there. It felt weird driving home for the first time after being away for over a week in the wilderness. I do love suburbia though, and I'm thrilled to have my phone charged consistently again. When we went out to eat I would request a table with an outlet (one poor foreign exchange kid had no idea what I was talking about) and charge my phone for as long as possible. It would then die within half an hour after leaving. Even though it was very inconvenient, it was great to be unreachable.
Ok- onto the recipe!
This is the first meal that Alex and I made together when we got back. It was amazing, mostly due to the marinated steak of course since I would be fooling myself if I said that I loved red cabbage. But a forkful of cabbage with a bit of steak on it is an enjoyable way to get some shunned vegetables. It gets thrown together quickly with two people working together (awww), but wouldn't take that long to prepare solo. I love the marinade. A few days later and I still salivate when I recollect how incredible it was. It was sweet with a great kick added by the sriracha, if you don't like spicy food then I wouldn't recommend this, otherwise it is something great to try.
This is a recipe from the June edition of Cooking Light.
1.5 lb flank steak- trimmed of excessive fat and seasoned with salt and pepper
1/2 tsp black pepper
1/4 tsp kosher salt
1/4 cup fresh lime juice
1 tbsp brown sugar
3 tbsp low sodium soy sauce
2 tsp minced garlic
1+ tsp sriracha sauce (depending on personal preferences)
1 red cabbage- thinly sliced
1 1/4 cup bean sprouts
3/4 cup julienned carrots
1/3 cup mint leaves
1/3 cup cilantro leaves
1/3 cup basil leaves
Heat a grill pan over medium-high heat. Coat the pan with cooking spray and cook the steak ~6 minutes per side.
Remove the steak from the pan and let it sit for 5 minutes (this finishes the cooking process) and then slice diagonally into thin strips.
Combine the lime juice, brown sugar, soy sauce, garlic, and sriracha. Set aside 2 tbsp of this sauce and marinate the meat in it.
Combine the cabbage and the remaining fresh ingredients in a large bowl and toss with the additional sauce. Add the steak and serve immediately.
Thursday, May 31, 2012
Mature Hamburger Helper
This is one of the few new recipes that we have made since we have moved. Add vegetables, more cheese, and maybe another variety of vegetable and it is good. I added tomatoes, but it would have been amazing with chopped celery and maybe some green onions. Alex helped make it, which makes it extra special as far as meals go around here.
Recipe from Budget Bytes
1 tbsp olive oil
1 lb ground beef- the fattier the tastier!
2 tsp garlic- finely chopped
1 small red onion- chopped
2 tbsp flour
1 tbsp chili powder
1/2 tsp smoked paprika
1/2 tsp dried oregano
8 oz tomato sauce
2 cups beef broth
2 cups pasta
1 1/2 cup shredded sharp cheddar- separated
Heat up a large pot over medium heat and add the olive oil and ground beef. Proceed to crumble and cook the beef. Drain the beef once it has been browned.
Return the beef to the pot and add the onion and garlic. Cook until the onions have softened- stir frequently!
Once the onions have softened add the flour and continue to stir the pot for an additional minute.
Add in the spices, tomato sauce, and beef broth and cook until the liquids have heated through.
Add your favorite kind of pasta to the pot, raise the temperature to a boil, place a lid on the pot and reduce the heat and proceed to cook for the recommended cooking time on your pasta box. If you need to add additional water to cover the pasta, do so!
Stir in 1 cup of cheese! Add in some vegetable fixings! Sprinkle the remaining cheese on top of individual portions.
This made enough for probably 3 adults. Stretch it further by adding more pasta, beef broth, and adjust the spices/herbs to taste.
Recipe from Budget Bytes
1 tbsp olive oil
1 lb ground beef- the fattier the tastier!
2 tsp garlic- finely chopped
1 small red onion- chopped
2 tbsp flour
1 tbsp chili powder
1/2 tsp smoked paprika
1/2 tsp dried oregano
8 oz tomato sauce
2 cups beef broth
2 cups pasta
1 1/2 cup shredded sharp cheddar- separated
Heat up a large pot over medium heat and add the olive oil and ground beef. Proceed to crumble and cook the beef. Drain the beef once it has been browned.
Return the beef to the pot and add the onion and garlic. Cook until the onions have softened- stir frequently!
Once the onions have softened add the flour and continue to stir the pot for an additional minute.
Add in the spices, tomato sauce, and beef broth and cook until the liquids have heated through.
Add your favorite kind of pasta to the pot, raise the temperature to a boil, place a lid on the pot and reduce the heat and proceed to cook for the recommended cooking time on your pasta box. If you need to add additional water to cover the pasta, do so!
Stir in 1 cup of cheese! Add in some vegetable fixings! Sprinkle the remaining cheese on top of individual portions.
This made enough for probably 3 adults. Stretch it further by adding more pasta, beef broth, and adjust the spices/herbs to taste.
Friday, May 25, 2012
Weeknight Asian Noodle Stirfry
I'm so glad that I am able to post this. I originally made this TWO MONTHS ago, thought that I had posted it, tried to find the recipe a while back and couldn't find it, then found it in my drafts. Naturally, I hadn't posted the recipe. Luckily I somehow google searched the crap out of this and came across the original recipe. AND HERE IT IS. Too lazy to rewrite it, since I didn't change anything.
This meal was extremely easy, and will probably be a frequent item on our table. The leftovers are spectacular, and it can be easily modified with different vegetables.
Wednesday, March 28, 2012
Adobo Chicken
A lot has happened since my last post! We put an offer on a house, it got accepted, we bought our first new piece of furniture (on clearance since I'm a cheapskate), I found out that I have three cavities (AAHHHHH!), and my car has a huge gash in it from some butthead that rammed into it. So, what I really mean to say is that we are now officially poor. Eek!
With all of this crud going on, I want a dinner that is simple, delicious, and makes leftovers so that I don't spend money at the cafeteria. Voila, adobo chicken!
Recipe adapted from Table for Two
Ingredients
***IMPORTANT!!! Do NOT add corn starch directly to the sauce without first mixing it with water. You will have clumps of corn starch nastiness floating around in the sauce, and the sauce won't thicken if you do this. Yuck yuck yuck!
With all of this crud going on, I want a dinner that is simple, delicious, and makes leftovers so that I don't spend money at the cafeteria. Voila, adobo chicken!
Recipe adapted from Table for Two
Ingredients
- 1 tsp olive oil
- 1/2 yellow onion- diced
- 6 cloves of garlic- minced
- 1/2 tsp ground black pepper
- 1/4 tsp cayenne pepper
- 2 bay leaves
- 1/2 cup chicken stock
- 1/2 low-sodium soy sauce
- 1/4 cup apple cider vinegar
- 5-6 chicken breasts
- 5-6 green onions- sliced thinly
- 1 tbsp corn starch mixed in with 1 tbsp water
Spread the olive oil over the bottom of a crockpot
Add the onion, garlic, peppers, bay leaves, stock, soy sauce, and apple cider vinegar and stir together.
Add the chicken and slosh the liquid over the top.
Add the lid to the crockpot and cook on high for 2 hours.
Line a broiler pan with tin foil.
Remove the chicken from the crockpot and wipe off any onions or other solids that may be on it.
Strain the liquid into a pot and discard the solids. Heat until reduced, about 20 minutes, or add the corn starch mixture to thicken the sauce***.
Brush the sauce onto each side of the chicken and place the broiler pan under the broiler for 2 minutes, flip the chicken and broil for an additional 2 minutes.
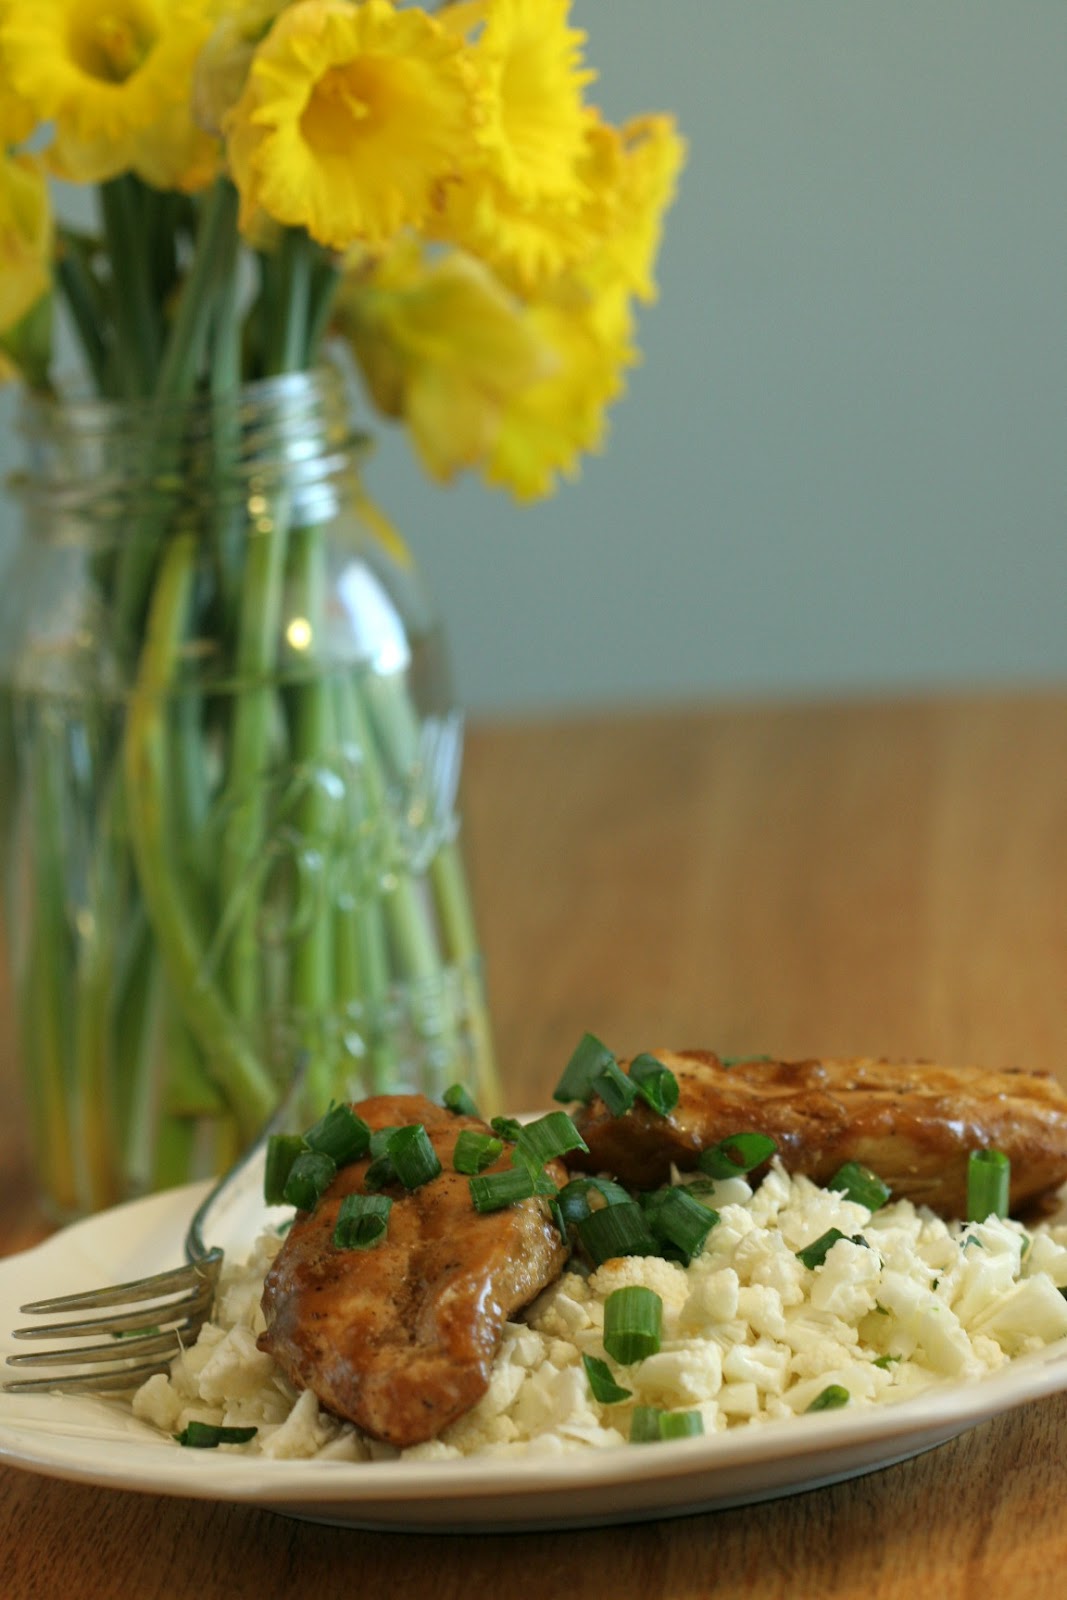
I served my chicken over a bed of finely chopped cauliflower and topped with additional sauce and green onion garnish.
***IMPORTANT!!! Do NOT add corn starch directly to the sauce without first mixing it with water. You will have clumps of corn starch nastiness floating around in the sauce, and the sauce won't thicken if you do this. Yuck yuck yuck!
Sunday, March 25, 2012
Saturday, March 17, 2012
This weeks menu
In an effort to utilize all of the groceries that we accumulate, I am going to post my menu for the week on this site. I tend to lose the menu that I write out for my shopping trip, so hopefully this will help!
Chinese Chicken Salad- 168 Sunsets
Vegetable Chicken Lo Mein- 214 Sunsets
Honey Hoisin Chicken Wings- 442 Sunsets
Yogurt Marinated Chicken Kebabs- 475
Spicy Buca Pasta
2 meals centered around what meat is on sale
Chinese Chicken Salad- 168 Sunsets
Vegetable Chicken Lo Mein- 214 Sunsets
Honey Hoisin Chicken Wings- 442 Sunsets
Yogurt Marinated Chicken Kebabs- 475
Spicy Buca Pasta
2 meals centered around what meat is on sale
Wednesday, February 29, 2012
French Onion Soup
I didn't realize how long it has been since I have cooked anything new! I have been absolutely beaten down by house hunting. It is frustrating when you find a gem of a house that has been on the market forever, put an offer on it, and have some other butthead swoop in and steal it. I feel like this hunt for a house has consumed my entire soul. At work? Looking at houses online. Off of work? Driving around to look at houses. Sleeping? Having nightmares about never finding a house. Waking? Having much more sensible fears about never finding a house. Also, apparently to get a house with a good kitchen you need to have a mortgage 25k more than ours.
To wrap this story up, I just want to say that I haven't been spending as much time in my own kitchen as I have in the kitchens of strangers. Dinner for us lately has been: a big bowl of popcorn, hamburger patties without a bun and other fun burger things, and restaurants that we have groupons for.
This soup has been the first meal in a long time that I have actually invested more than five minutes into, and it's fabulous- and healthy. It also changed my opinion on swiss cheese being gross.
Recipe from Ellie Krieger
- 2 small leeks- remove the green top, cut the remaining leek in half and slice thinly
- 3 yellow onions- finely chopped
- 2 tbsp fresh thyme
- 1 bay leaf
- 1 tbsp flour
- 1/2 cup white wine
- 3 cups low-sodium beef broth
- 2 cups water
- Salt
- Pepper
- A few slices of whole wheat bread
- Swiss cheese- about 1 cup shredded
Heat some oil in a large pot over medium heat- add the leeks, onions, thyme, and bay leaf.
Reduce the heat to medium and stir occasionally until the leeks and onions have caramelized/browned.
Sprinkle the flour over the onions and stir.
Add the white wine, beef broth, and water and bring to a boil.
Reduce the heat to medium and simmer for about 15 more minutes- this reduces the soup
Toast your bread and then tear into large chunks
Season the soup with salt and pepper.
Ladle the soup into bowls and top with the toast and swiss cheese.
Wednesday, February 8, 2012
Baked Mozzarella Sticks
Back in the day when I was a nerve-wracked obsessive compulsive little kid I would ONLY order mozzarella sticks when I went out to eat with my family. I would also attempt to get to a certain destination - say the bathroom- in a certain amount of strides. I have become less weird over the years. I still really like mozz sticks.
I've attempted to make my own before, but I made a few mistakes. I have since then altered my method and this is a fail-proof way to make delicious cheese sticks. For loyalty reasons I used Crystal Farms Wisconsin Mozzarella Cheese sticks (since Minnesota isn't cool enough to have their own) which worked quite well, but I'll be trying out different cheese varieties in the future to see if I can find the perfect type.
This is a plan-ahead kind of snack since you need to freeze the sticks. I usually am an instant gratification kind of person when it comes to food, but it was nice to be able to get back from doing stinky horse chores, preheat the oven, hop in the shower, throw cheese sticks in, do my hair and in ten minutes have lunch.
Ingredients
I've attempted to make my own before, but I made a few mistakes. I have since then altered my method and this is a fail-proof way to make delicious cheese sticks. For loyalty reasons I used Crystal Farms Wisconsin Mozzarella Cheese sticks (since Minnesota isn't cool enough to have their own) which worked quite well, but I'll be trying out different cheese varieties in the future to see if I can find the perfect type.
This is a plan-ahead kind of snack since you need to freeze the sticks. I usually am an instant gratification kind of person when it comes to food, but it was nice to be able to get back from doing stinky horse chores, preheat the oven, hop in the shower, throw cheese sticks in, do my hair and in ten minutes have lunch.
![]() |
| Cheesey goodness |
- 10 mozzarella cheese sticks
- 1/2 cup flour
- 2 eggs- lightly whisked until homogenous
- ~2 cups Italian style bread crumbs
*The process is simplified if you put the flour, egg, and bread crumbs in their own bowl that is wider than the cheese stick.
- Roll each cheese stick in flour until the entire surface has been thinly coated
- Dunk the cheese in egg- make sure to get the ends!
- Gently bury the cheese in the breadcrumbs
- Repeat steps 2 and 3
- Freeze the cheese sticks- this is a crucial step and must be done for at least a couple of hours
- Preheat the oven to 400 degrees
- Place the cheese sticks on a pan lined with tin foil and bake 5 minutes on each side
- Eat immediately- mozzarella cheese sticks are not meant to be slowly savored!
Subscribe to:
Posts (Atom)