Thursday, December 15, 2011

Deconstructed Guacamole Salad

I love guacamole, but it definitely has a few drawbacks.  I rarely make it because I despise cleaning my food processor, and I have not yet splurged on a fancy guacamole mortar and pestle (which also doesn't sound fun to clean).  Chopping up the ingredients creates a smaller mess, and it makes it easier and more enjoyable to eat with a fork instead of a salty chip.

Ingredients
1 avocado- chopped
a handful of small tomatoes- chopped
1-3 tbsp fresh cilantro
1 lemon
Sea salt

Combine the avocado, tomato, and cilantro.
Squeeze about 2 tbsp of lemon juice over the salad (or more) and sprinkle with sea salt.
Serve immediately. 

Simple stuff- yay!

Thursday, December 8, 2011

Beef Stew

This stew was a big hit, I loved it so much that I even had a bit for breakfast (don't judge!).  I didn't have all of the ingredients from the original recipe, but it still turned out amazing and I can't wait to get my hands on the full list of ingredients so that I can bring it to the next level.  For the past year I have rarely made the same meal twice, but I think that this one will be making regular appearances.

Recipe adapted from Skinny Taste

Ingredients

  • 1 cup of green onions- chopped
  • 3 cloves of garlic- minced
  • 2-3 small tomatoes- diced
  • 1.5 lb choice beef stew- cut into bite-sized chunks
  • 1/3 cup beer
  • 1/3 cup water
  • 1/2 tsp cumin
  • 1/4 tsp salt
  • 1 bay leaf
  • 4 baby red potatoes- quartered

Heat some evo oil over medium heat in a large dutch oven.  Add in the green onions and garlic and saute for 2 minutes.  Add in the tomatoes and a pinch of salt, and stir for another 2 minutes.
Add the beef, beer, water, cumin, salt, and bay leaf to the pot.  Cover the pot, reduce to a simmer, and cook for 1 1/2 hours.
Add the potatoes and cook covered for another 20 minutes.  If you want to serve this with rice, this would be a good time to start cooking some.


Wednesday, November 23, 2011

Lemony Pork Chops

One of the most apparent things about me (or so I think anyway) is that I am extremely frugal/cheap/stingy.  One of the main reasons that I want my own house is so that I can have a huge whopping vegetable garden so that I can reduce my grocery bill.  

One of my most cherished plants are herbs.  I love them so much that I found myself tending to a forest of basil and oregano this past summer.  Now that I don't have my own herbs at hand to use, my stingyness has spread to my consumption of them.  This is why I made almost the exact same recipe as the one below (obviously with different meat), since I refuse to let $.75 worth of parsley go to waste.  Mhmm.

This was my first foray into cooking pork, and I'm glad that I finally got around to it because it was an incredibly satisfying meal (and made great leftovers too).


Recipe from Great Food Fast

Ingredients
  • zest of 1 lemon- minced
  • 2 tbsp fresh parsley- chopped
  • 1 garlic clove- minced
  • salt and pepper
  • 2 tbsp olive oil
  • 4 bone-in loin pork chops
Combine the lemon zest, parsley, garlic, 1/2 tsp salt, and 1/4 tsp pepper in a small bowl and set aside.
Heat up the olive oil in a skillet large enough to accommodate all of the pork chops over high heat.
Season each side of the pchops with salt and pepper and cook 2-3 minutes per side.
Add 1/2 cup of water to the skillet, bring to a boil, then reduce the heat to medium-low and cover the skillet.
Cook for 8-10 minutes.
Top the pchops with the parsley mixture and a drizzle of the pan juices and devour.


Thursday, November 17, 2011

Parmesan Chicken

I grew up devouring skin-on/bone-in chicken breasts.  Once I moved away and realized that touching raw chicken is... not the most fun thing ever, I switched to the boneless/skinless variety since it is less work and more versatile.  Apparently so has most of America, which makes finding the chicken for this meal an epic quest.  The only skin-on chicken that my store had was sold in a 10-pack (which was the same price as a 4-pack of skinless chicken), so I bundled up the extra breasts and threw them in the freezer so that I can make this meal again in the near future.  

This is a great recipe for those who enjoy more traditional meals, but is exciting enough for those who love expanding their palate.

Recipe from Great Food Fast

Ingredients
  • 1 cup fresh Italian parsley- chopped
  • 1/4 cup Italian style bread crumbs
  • 1/4 cup grated Parmesan
  • Zest of 1 lemon
  • 4 bone-in chicken breast halves
  • s&p
Preheat oven to 450.
Mix together all of the loose ingredients and season with salt and pepper.
Separate the mixture into 4 mounds.
Pull up the skin on the fleshy side of the chicken breasts and tuck in the mixture, season the chicken with s&p.
Place in a roasting pan and bake until the chicken is cooked to 165 degrees, which should be around 30 minutes depending on how large the chicken breasts are.

Friday, November 11, 2011

Spicy Lentil Soup

There are few meatless meals that Alex enjoys, and there are few leftovers that Alex will actually bring to work the next day.  This is one of those meals, and it is SPICY.  If you are spice sensitive you will want to cut down on the amount of cayenne pepper.  I had a hard time with the soup straight up, but I served it with saffron rice which significantly lessoned the kick.
Rating 8.75/10


My tongue tingles just looking at the pic
Recipe from My Fiance Likes It

  • 1/2 cup lentils (any lentil variety should do, I used regular green lentils which are the easiest to find)
  • 1 onion- chopped
  • 1 tomato- chopped
  • 1/4 tsp turmeric
  • 1/4 tsp cayenne pepper
  • Juice of 1 lemon
  • Salt and pepper
  • 1 tbsp olive oil
  • 1 tbsp garam masala
  • 1 red bell pepper-seeded and chopped
  • 1 yellow pepper- seeded and chopped
  • 1 cup vegetable stock
Prepare the lentils as indicated on their packaging, cook the turmeric and tomato with the lentils.
Heat a pan over medium heat, add the olive oil, bell peppers, and onion.  Stir until the onions soften and then add the garam masala.  
Continue to cook for about 1 minute then add in the cayenne pepper, salt and pepper to taste, and lemon juice.
Combine the bell pepper mixture with the lentils, add in the vegetable stock, and simmer for 10 minutes. Add more salt and pepper if necessary
Serve over saffron rice and enjoy!

Crockpot Chicken Teriyaki

This is one of my favorite recipes, and it is extremely easy.  I don't have much else to say about it!  Rating 9/10.

  • 3 lbs of boneless skinless chicken thighs or breasts
  • 1 cup soy sauce
  • 2/3 cup of sugar
  • 1/3 cup apple cider vinegar
  • 3/4 tsp ground ginger
  • 3 cloves garlic- minced
  • a few pinches of pepper
  • 1 tbsp corn starch or arrowroot powder
  • Green onions- chopped
  • 1 red onion- cut into strips
Combine all of the ingredients EXCEPT for the cornstarch in a crockpot.
Cook on high for around 3-4 hours or on low for 6 hours, or until the meat is fork tender.
If desired, add in cornstarch to thicken the sauce.
Heat up a small pan, add 1/3 cup of the juice from the crockpot and the red peppers.  Cook until heated through.
Serve the chicken and pepper over rice and garnish with green onions.

Pumpkin Brownies

When I moved back home to the Twin Cities I started working for my dad doing some super badass carpentry jobs.  Just so you know, nothing will boost your self-esteem more than being a girl smothered in painty clothes walking through the Home Depot at 7 am.

Anyway, physical grunt work took all of my energy, and my workout routine that I maintained for over a year kicked the bucket.  This didn't take much of a toll on my body since I was still doing very physical stuff at work.  In fact my skinny jeans from high school started to fit again.  Geez, was life ever hard!  Then work started slowing down for me, since I'm too inexperienced/short to do a lot of the jobs that my dad has had lined up.

This isn't a pity post, but since I stopped working for my dad full time I have developed more body insulation than necessary.
This is what 1 lb of fat looks like, tasty!

My solution?  Pick up my workout routine again- I have a wedding dress to fit into!  Sometimes I need to remind myself that even though I eat a healthy and balanced diet, I need to remain active in order to stay slim (and vice versa if I worked out but ate a lousy diet).  I made these brownies to mark the end of my laziness.  Counterintuitive?  Yes, but these brownies are relatively healthy compared to the classic brownie.  They are low fat, natural, but kind of high in sugar (especially if you eat half of the brownies- oops).

Anyway, I have recommitted myself to picking up my fitness routine once again.  That way I can remake these brownies again and not feel guilty :).  Tomorrow is always a fresh start!

I loved these brownies (obviously), but Alex didn't seem to be as crazy for them as I was.  I think that it had to do with the fact that I told him that they were healthy before he even had a bite, so he was probably seeking out potato or rutabaga undertones.  I give them a 9/10.

A while back I went to every craft store in my area to hunt for animal cracker shaped cookie cutters.  Definitely worth it.
  • 1/4 cup unsweetened cocoa powder
  • 1/2 cup whole wheat pastry flour
  • 1/4 tsp baking powder
  • 1/4 tsp + 1/16 tsp salt
  • Heaping 2/3 cup sugar
  • 1/2 cup pumpkin puree
  • 3 tbsp vegetable oil
  • 2 tbsp almond milk
  • 1 1/2 tsp vanilla extract
  • 1/2 cup chocolate chips (optional- I didn't add any)
Preheat oven to 330 degrees
Mix the wet and dry ingredients separately and then combine together.
Line an 8x8 pan with coconut oil and spread the batter over the pan.
Bake for ~25 minutes or until a knife can be inserted into the brownies and come out clean.

Sunday, November 6, 2011

Pumpkin Quinoa Bake

I surprised Al with breakfast in bed yesterday.  This consisted of him being passed out, me walking in, poking him in the ribs and handing him a bowl full of this goodness.  He inquired as to what it was, I didn't answer because I thought that he might think that it was gross if he knew what it was.  Well, we both ended up loving it.  It had a hint of pumpkin without being too pumpkiny.  I especially loved the glaze (I may have eaten half of it while the quinoa mixture was baking).  If you get around to baking this, make sure that you use a dish that had an ovenproof lid.  Rating 8/10.

Recipe adapted from Healthful Pursuit

Ingredients

  • 2/3 cup unsweetened almond milk
  • 1/4 cup pumpkin puree
  • 1/4 cup quinoa
  • 1 tbsp maple syrup
  • 1 tsp melted coconut oil
  • 1/4 tsp vanilla extract
  • 1/2 tsp ground cinnamon
  • pinch of ground nutmeg and ginger


Topping

  • 1 tbsp maple syrup and 1 tbsp melted coconut oil mixed together
  • Walnuts, pecans, or almonds
Preheat oven to 350.
Combine the first set of ingredients together and place in a dish that has a oven-safe lid.  
Cook covered for 30 minutes, or until the top is golden and the quinoa is soft.
Remove from oven, drizzle the topping over the quinoa.
Return to oven and bake for an additional 10 minutes uncovered.

Friday, November 4, 2011

Pumpkin Pie in a Jar

Once in a while I like to make my man a special treat.  It's my way of showing my love and appreciation for him, since I can be a nag at times.  I like to make sure that these treats are packed with goodness, and that the empty calories are kept to a minimum.  One of the biggest calorie culprits in the pie world is the crust, and using jars is a great way to get around that dilemma.  Oh, and it helps that the finished product looks so cute (and can help with portion control if that is a problem for ya).


Adapted from Natural Noshing
Ingredients

  • 2 cups pumpkin puree (or butternut squash)
  • 1/2 cup milk of choice
  • 1 egg
  • 1 tsp vanilla extract
  • 1/4 cup sweetener (I used turbinado sugar)
  • 1/4 cup flour
  • 2 tsp ground cinnamon
  • 1/2 tsp ground ginger
  • 1/4 tsp sea salt
  • 1/8 tsp ground cloves
  • pinch of nutmeg and allspice
Preheat oven to 350 degrees
Blend all of the ingredients together and divide into jars that have been greased with butter or coconut oil (I used two pint-sized jars)
Bake for ~40 minutes or until a toothpick can be stuck into the center and comes up clean
Let cool and eat with granola, whipped cream, or nuts on top.

Wednesday, November 2, 2011

Asian Lettuce Wraps

Have you ever been to PF Changs?  If so, then the chances are high that you have stabbed somebody's hand with your fork so that you could grab the last of the chicken wrap appetizer fixings for yourself.  It isn't anything to be ashamed of really, we've all done it.  Anyway, this dish is almost as good as the real deal.  If you already have all of the oils (most can be found in the ethnic aisle at your grocery store- don't ask any youngish grocery clerks where any of the more obscure sounding oils are- they don't know) then it is pretty cheap to whip up as well.  Hello future frequent meal!  Rating 9/10.

Recipe adapted from Iowa Girl Eats

Ingredients

  • 1 lb ground chicken or turkey
  • 1/2 yellow onion- diced
  • 1 inch of fresh ginger- minced
  • 2 cloves of garlic- minced
  • 1 tbsp sesame oil
  • 2 1/2 tbsp soy sauce
  • 1/2 tbsp water
  • 1 tbsp peanut butter
  • 1/2 tbsp honey
  • 1 tbsp + 1 tsp rice vinegar
  • Sriracha sauce to taste
  • salt and pepper to taste
  • 5 green onions- chopped
  • 1/2 of an 8oz can of water chestnuts- chopped (found in the Asian section)
  • Chopped peanuts
  • Head of lettuce- bottom sliced off and leaves separated
Heat up a skillet over medium high heat and add in your ground meat and onion.  Stir frequently
Add all of the liquid ingredients together in a small microwaveable bowl and microwave it for 20 seconds- mix the liquids together and set aside.
Once the meat is mostly cooked add in the ginger, garlic, and liquid ingredients.
Once the meat has browned completely add in the green onions and water chestnuts, cook until the onions have wilted slightly.
Add sriracha sauce to taste (I added a couple of tbsp which left a nice residual zing on my taste buds)
Serve your meat wrapped on a lettuce leaf, or on top of a bed of greens if you don't want to risk having juice drip down to your forearm.  
Top with peanuts- devour!

Easy Marinara Chicken

Even though this recipe is extremely simple, I found myself continuously standing in front of the oven.  I wasn't laboring over the dish or anything, but I was opening the door to stick my snoz in it.  This dish is simple, enticing, and satisfying.

Also, using chicken thighs instead of chicken breasts is much cheaper and much more flavorful.  8 all-natural thighs cost me around $4, can't beat that!

I swear that there is chicken in there somewhere!
Recipe adapted from Pioneer Woman

  • 8 chicken thighs
  • 1 1/2 jars marinara sauce (Bertolli was one of the cheapest ones at my store that I found and it was great)
  • 1 yellow onion- diced
  • 4 garlic cloves- minced
  • 1 handful chopped parsley leaves
  • Parmesan cheese for topping


Preheat oven to 300 degrees.
Heat olive oil in a skillet over medium high heat and add cook the chicken thighs for two minutes on each side.  This is to amp up the flavor a bit.
Remove the thighs (they won't be done yet) and add the onion and garlic to the skillet and stir until fragrant.
Add the thighs back into the pan and add the marinara sauce and parsley.
Place a lid on the skillet and place the pan on the middle rack of your oven.
Bake for 90 minutes and serve over your favorite pasta.

Serves 4

Saturday, October 22, 2011

Fall Soup

I haven't been cooking much lately, and I have a good reason.  I got offered a job- yay!  That means we went to Buca di Beppo to celebrate and we have been eating leftovers ever since.  I'll be working at a hospital in Minneapolis, and I can't wait to start (it doesn't hurt that the cafeteria there is so good that I will probably hit it up even when I'm not working).

Anyway, to celebrate my first fall as an adult with responsibilities (I never thought that I would miss essays this much!) I made this extremely orange soup with some vegetables that I had lying around.  It immediately had me going nom nom nom in a soup trance.  The soup turned out to be creamy, savory, and filling (even without the half and half).  Alex preferred the soup without the half and half, but I liked it with a dash of cream since I am still getting acquainted with squash.  I can't wait to make this again!  Rating 8.5/10


Recipe adapted from Wishful Chef
Ingredients
1 large butternut squash- chopped
1 medium red onion- chopped
2 carrots- chopped
1 sweet potato- chopped
2 cloves of garlic- minced
4 cups of vegetable stock
salt and pepper to taste
half and half

Add the vegetables and 2 tbsp olive oil to a stock pot that is set over medium heat.
Cook the vegetables for about 5 minutes, or until fragrant.  Stir frequently!
Add the vegetable stock, bring to a boil, cover, and simmer for half an hour (and run to Target for half and half)
Remove the soup from heat, puree it in a blender or with an immersion stick.
Season with salt and pepper, add 1 tbsp of half and half to each bowl if desired.

Serves 6+

Thursday, October 13, 2011

Roasted Peppers and Browned Butter

Last night Alex and I took it pretty easy when it came to dinner.  Not as easy as tonight (spinach and goat cheese Archer Farms pizza for me... I DID have plans to make a feast, but my lengthy Target trip got in the way).  When I say easy, I mean that we had a low ingredient count dish.  However, ALL of the ingredients except for the salt (I should have picked some up in Utah) and cheese were prepped with our hands.  Homemade pasta, homemade roasted peppers, and browned butter.  It was really good, I am still thinking about how satisfying it was over 24 hours later.  It was so good that there is no good in-focus picture because I made the mistake of sampling it as I was bringing my plate over the to the table.

Oh, and the aroma of roasted peppers is probably even better than that of apple butter.


How to make roasted peppers
The peppers don't need to be completely charred all over, but the skin does need to be pretty wrinkly/loose

Preheat your oven to 450 degrees
Place your sweet peppers on a tin foil lined pan and set on the middle rack in the oven.
After 15 minutes flip your peppers 180 degrees
Roast for an additional 15 minutes and remove from your oven.
Place in a closed paper bag or a covered bowl for 5-10 minutes.  This will help the skin loosen up and be easier to peel.
Remove the skin and slice your peppers into strips.

How to make browned butter
This is just before the butter started to kick up brown specks.  Don't judge my dirty stove top!
For every 2 people place 5 tbsp of unsalted butter in a small saucepan.
Constantly whisk the butter over medium heating.
After a vigorous bubbling session, the butter should start to have a nutty aroma and kick up flecks of brown.  Keep whisking!
Remove the pan from the heat now, or continue to whisk the butter to allow the butter to brown a bit more.  You do not want your butter to turn black.
Serve over your pasta with a sprinkle of sea salt and parmesan cheese, nom nom!

Thursday, October 6, 2011

Day Trip and Apple Butter

I haven't really been a good blogger lately.  Al and I found the perfect house (ok, it's the second perfect house that we have found so far and it has bad radon problems- blahhh), and I need to find a full time job in order to make this work.  I have a few interviews coming up, so cross your fingers for me!  

Last weekend I was able to take my mind off of all of this because Al and I were lucky enough to be invited to go to some Wisconsin wineries with one of my best friends who is doing a story on them for a magazine.  My mother did not raise a dumby, and I eagerly accepted her invitation.  It was one of the best trips of my life.

First we drove up to an apple winery in Bayfield, WI appropriately titled Bayfield Winery.  We ended up driving to their production and storage building.  Yes, I was tempted to steal an entire box of wine (especially since we helped the lady move some into her truck to bring to the shop, I definitely had the opportunity).


From there we drove to the family orchard where they grow all of their future boozy apples.  Oh, and this is where you can serve yourself free samples of ALL of their wine.  If I liked apple wine more I would have had to be brought out to the car in a wheelbarrow.  In addition to wine they also sell all sorts of apples and apple-based products, it was hard to leave without hauling a truckload of jelly and bbq sauce out of there.  
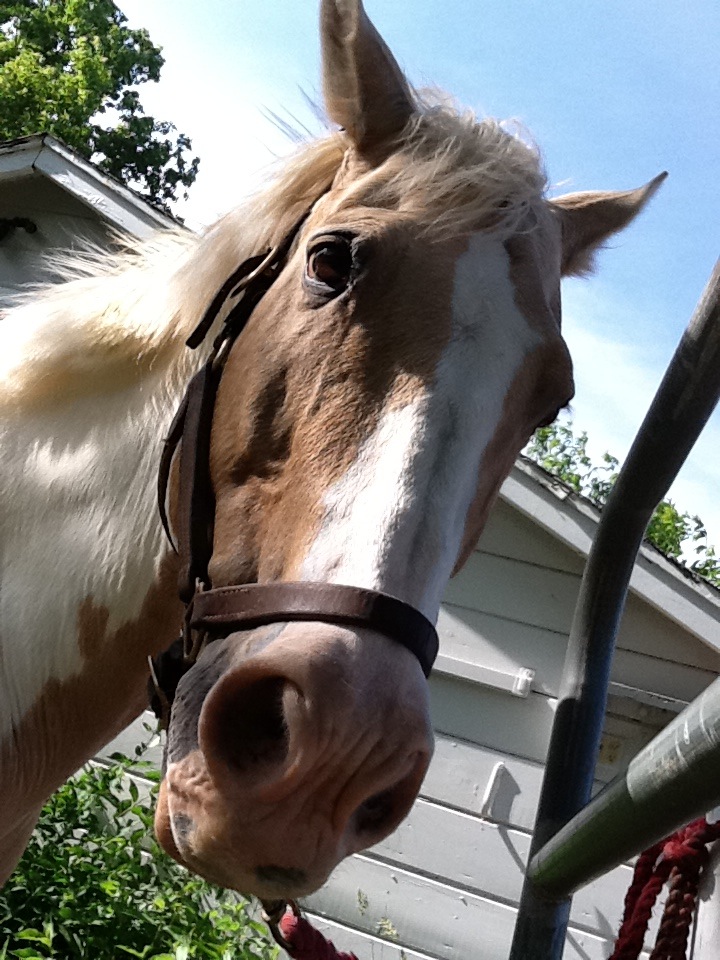
Where's the pitchfork?

I did however buy a whole bushel of Macintosh apples.  It was an impulse buy for sure, but because they were "2nds" (aka had bruises) I got the whole thing for $16.  
Happiness is too much fruit

Now I had no idea how to use up all of these apples, especially since my uncle was awesome enough to bring over 4 honking bags full of apples for the horses, so it wasn't like they needed them or anything.  I didn't want to make any baked goods, so I settled on making apple butter (they had some at the orchard and I almost bought some- but it was $5 for way too small of an amount for my cheap self).  I have never made apple butter before, but I figured that it had to be easy.  And it is.  You will thank yourself profusely if you make some.

Here is my recipe/method

Roughly chop up your apples 
Fill your slow cooker about 3/4 of the way.  If you pack the apples in there you are going to have some serious overflow onto your countertop (not that I would know a thing about that...)
Add any desired spices (cinnamon, nutmeg, sugar, cloves)- these can always be adjusted later so start out with conservative levels.  This will turn out just as amazing without spices.
Turn your slow cooker onto the high setting, put the lid on it, and walk away for 3-4 hours.
Don't try taking an afternoon nap, the tempting aroma of apple goodness will wake you up.  Yes that is a step.
After 3-4 hours reset the lid on the slow cooker so that it is crooked- this will allow the heat to escape and your apple butter will reduce to make it more buttery and less saucy.  Carefully taste to see if you are pleased with the spice direction that you are going into and adjust to taste if necessary.
Walk away and consider yourself the apple queen or king as you close your eyes and continue to appreciate what an awesome aroma you just put into motion.
Return periodically (once every hour or so) and stir.
After another 3-4 hours your apple butter should be so tempting that you can't wait another minute for it to be done.  Unplug and let cool slightly.
Whip out your immersion blender or blender of choice and pulverize your apple butter to your desired consistency. I like having some texture in my AB, so I only lightly blended it.  Note- if you added whole cloves you may want to remove them at this point so that your AB doesn't taste like an incense stick.


Serve straight up on a spoon, on your toast, as an apple dip, on top of pancakes, with pretzels, with anything that you can think of that sounds good!

Eat within a week or so or else go through the canning process so that you can have apple butter all year long.

Some more Bayfield shots, just so you can kind of see how charming this place is


Friday, September 30, 2011

Fresh Broccoli Salad

As a bride-to-be I made the horrible decision of buying a dress that is zippered instead of laced over a year ahead of my wedding.  As a precautionary measure I have started to decrease my carbs (good bye meals consisting only of bread and olive oil...) and increase my vegetable intake... by like 10x my normal amount.  Granted, my lifetime average of veggie servings is usually ~1-2 a day (generally on top of a pizza).  Most of us go on to live our lives thinking that vegetables can only taste good when they are seasoned beyond recognition or are dunked in a questionable white sauce.

I am no raw foodie by any means, but that doesn't mean that I can't appreciate that uncooked food has higher nutrition levels than their roasted and sauteed counterparts.  I am trying to get away from my former opinion that raw food is snooze-worthy, and this salad definitely helps.  It provides an overall sweet flavor with a satisfying variety of textures in every spoonful.  This salad does get mushy after a few hours- be warned!

Rating 8.5/10

Recipe adapted from Running to the Kitchen
3 heads of broccoli
2 large carrots
1 sweet apple- chopped
1/2 cup of dried craisins
1 lemon- juiced
extra virgin olive oil
sliced almonds
Salt and pepper (optional)

Shred your broccoli and carrots in a food processor in manageable batches, or hack into smithereens with a knife.
Combine the broccoli, carrots, apple and craisins in a medium sized bowl.
Drizzle the lemon juice and a to-taste amount of olive oil over the bowl and stir everything up.
Top with the sliced almonds.
Have a toothpick ready for any green clumps that might appear in your teeth if you shove this salad into your mouth without any control (like I did).
Enjoy!

Saturday, September 24, 2011

Grilled Tomatoes

I came home from San Francisco expecting to find dead tomato plants and rotten tomatoes lying everywhere.  Instead I found dead tomato plants with gorgeous tomatoes still attached.  Oh, and my basil plant is still kicking.  Life is rough sometimes like that.  This recipe is sooo good, and it might have been even better without the basil topping.  Definitely a great 5-minute snack or meal!  Rating 9/10.
Recipe adapted from For the Love of Cooking

4-5 medium tomatoes- sliced in half and sprinkled with salt and pepper
1 tbsp extra virgin olive oil
1/4 tsp balsamic vinegar
1 1/2 tbsp lemon juice
1 garlic clove- minced
1 tbsp basil- finely chopped

Heat a grill pan over medium-high heat and spritz with a light coat of PAM
Start to prepare the marinade while you grill the tomatoes by combining the evoo, balsamic vinegar, lemon juice, garlic, and basil.
Place tomatoe halves flat side down and cook for about 2 minutes or until you have some nice char lines going.
Flip the tomatoes and continue to cook for another 2 minutes.
Serve up the tomatoes on a plate and douse with the basil mixture.

Coconut Balls- moderately healthy

I don't really have an eloquent title for this, and Al's was not the most appropriate.  He created this masterpiece today, but I didn't know what he was doing until he had already thrown a bunch of stuff together- so this isn't a precise recipe and I had to guess the measurements based on how much of the ingredients were leftover, but it seems pretty hard to mess up. These are good.  So good that I thought that I should show it off for Al.  I ate five today for dinner.  Rating 10/10.

Recipe by Al
Approximately 3 cups dates
1 cup walnuts
1.5 tbsp honey
Approximately 1 bag of chocolate chips- melted
Approximately 1 cup of unsweetened shredded coconut

Combine the dates, walnuts and honey in a food processor.  Adjust ingredients so that they clump together but aren't overly sticky.  Honey= stick and dates= substance.
Roll the date mixture in your hands to create balls into desired size.
Plop the date ball into the melted chocolate and thoroughly coat with chocolate
Use a spoon to transfer the date ball into a bowl filled with the shredded coconut and do your best to coat it with coconut.
Transfer all of the coconut balls to a covered bowl and refrigerate.

Wednesday, September 7, 2011

Zucchini Cheddar Bread and a Review

I still have too much Big Bertha-sized zucchini piled on my counters, and I finally don't feel guilty about giving some of them the heave-ho into the compost pile.  However, I used up approximately 1/2 of a giganto zucchini in this bread recipe.  Be warned- the bread tastes like cheezits when it comes out of the oven.  Next time I manage to have a block of aging aged cheddar and a whomping zuch around, I'll make this with all purpose flour to make the cheese stand out more after it has cooled to room temp.

Alex really liked this bread, my dad didn't get it, and I thought that it tasted great smothered in butter.

Recipe from Naturally Ella- check it out

On to the review!

A few weeks ago I was contacted by a representative of http://www.easycanvasprints.com/ asking me if I would be willing to review their canvas prints.

Obviously I said yes, and here is my review!

The process of ordering a print is easy peasy.  You get to choose your own photo to have printed (assuming that its resolution is high enough) OR you can choose one of their art prints.  You can choose a canvas size anywhere from 8x8 to 40x40.  There is a meter that indicates whether or not your photo quality is high enough to be printed.

The canvas is wrapped around a wooden frame that is about 1" thick.  You can choose to have the photo extend to edges of the canvas that hit the wall, or have a solid color "framing" your photo.  I personally think that having the imaged wrapped around the edges is what makes this service worth it, otherwise why bother with it at all?  3D photo displays are the best.

One issue that I had with http://www.easycanvasprints.com/ is that they charge for color finishing (aka changing your photo to black and white or to sepia), I suppose this is a valuable service for those rare people who lack iphoto or any other software that can do this for $0.  As far as I know they won't charge you if you upload a photo that is already B&W, so do so if you want a B&W print.  However, I do think that it is nice that they will retouch your photos for a fee (and you can give them instructions on what you want done).

Onto what I ordered!  I had a hard time deciding what to get printed.  I figured maybe I would want one of these studs to grace the canvas
But I decided that in the end I wanted something impersonal, since I can just print out those photos at a Target, slap them in a frame, and call it a done deal.  Having a glossy photo of something completely random framed is a little weird, but I figured that it would be perfect for a canvas print.


Those are mangosteen by the way.  I figured that since I was contacted through my food blog, that my product should somehow relate to food, and I love mangosteen.  They are gorgeous in addition to being addicting.  The only problem is that I have no idea where to hang it, hence it just leaning against a wall waiting for its perfect home.  We're currently living in limbo at my mom's house while it is on the market while working on our future "apartment" in my dad's basement.  

Having a photo printed on canvas is a great present for whomever has a special day coming up, whether it be a mother's/father's day present, birthday, housewarming, wedding, ANYTHING!

Because I am a cheapskate, I inquired about any discounts that I could offer you should you decide that you must have one.  Now that I have one, I wouldn't let anyone pry it away from my dead fingers.  Just so you know.  I figured that there would be a cute blogger discount available for around 15% like you see EVERYWHERE, but I can do you one better.

If you check out Easy Canvas prints on Facebook and "like" them, you can get 50% off of your order and free shipping.  Neato?  Yes.  If you like spending money or shun social networking sites, they are currently running a 25% off and free shipping deal without having to like anything on Facebook.

Sunday, September 4, 2011

Guilt-free Reeses Soft Serve

If there is something that I can get behind 100%, it is a healthy, natural, and wholesome treat that tastes like the stuff that I used to devour before I understood what a calorie was.  Anyway, this "ice cream" is healthy AND you make it without an ice cream maker.  You DO need a food processor or a super blender.  Oh, and you don't need dairy.  Adjust the ingredients to your taste, but this recipe is a great starting point (and finishing point, in my mind).

Rating 10/10

3 bananas- chopped up and frozen
1 heaping tbsp peanut butter
1 tbsp cocoa powder

Combine ingredients in a food processor or super strength blender and blend for several minutes until the banana is completely blended and has the consistency of soft serve ice cream.
Serves 2

Tomato Soup

Ahhh, I'm running late on posting!  I made this soup over a week ago, but I can still remember how satisfying it was to craft my own soup vs. dumping something out from a can.
Onto the soup!
Recipe adapted from Spelonca
12 medium tomatoes- you can skin them if you want.  I didn't.
3 tbsp extra virgin olive oil
1 tbsp dried basil
2 cloves garlic- minced
1 tbsp fresh basil- minced
2 tbsp fresh oregano- minced
1/2 tsp freshly ground black pepper
1 tbsp coconut oil
1 tsp sea salt

Chop each tomato in half.
Line a tray with tin foil and place the tomatoes with the seedy part facing up.
Top with olive oil, dried basil, and 1/2 tsp sea salt
Roast at 300 for half an hour.  Flip and roast for an additional 30 minutes.

Place the tomatoes (don't add the juices- this will make your soup quite thin) into a blender and blend.

In a medium pot heat up the coconut oil and the garlic.  After 10 seconds add 1/2 tbsp fresh basil and 1 tbsp of oregano.
Reduce the heat and add the tomatoes.
Add half of the remaining fresh  herbs and the rest of the salt.
Add water if the soup is too thick, continue to simmer if the soup is too thin.
Add the remaining fresh herbs before serving.

Serve with grilled cheese, because that is the only way to fully enjoy tomato soup.

Monday, August 29, 2011

Meatless Monday- Lentil Walnut Burgers

I have made the decision to attempt to hop on the Meatless Monday bandwagon.  I accidentally let this slip to Al, and he was naturally horrified that there is indeed such a fad.  Oh well, chef's choice in this household!

Despite the absolute lack of meat in this meal, Alex and I both really enjoyed it.  I wish that I had doubled it so that I would have some leftovers tomorrow for lunch.  Alex even commented that it tasted like meat, score!  The spices add a nice Middle Eastern flavor, which was extremely welcome since we haven't found any good restaurants of the sort nearby.


Rating 9/10
Recipe from Great Food Fast

Burger 
3/4 cup lentils- rinsed (remove any lentils that float)
3/4 cup walnuts
1/3 cup plain breadcrumbs (whole wheat if you can find them)
3 garlic cloves
2 tsp ground cumin
2 tsp ground coriander
1/4 to 1/2 tsp red pepper flakes
1 1/2 tsp sea salt
1/4 tsp ground pepper
4 tbsp olive oil- divided
1 large egg
Lettuce leaves or buns

Preheat oven to 350 degrees.  Place walnuts in a single layer on a baking sheet and bake for ~10 minutes until darkened and aromatic.  Remove from oven and let cool.
Place lentils in a saucepan and cover with water by 1 inch.  Bring to a boil and then reduce heat to a simmer.  Cook for 15-20 minutes.  Drain and let cool.

Whip out your food processor or super-blender.  Add the walnuts, breadcrumbs, garlic, cumin, coriander, red pepper flakes, salt, and pepper.  Pulse until blended.
Add in the lentils and 1 tbsp of olive oil.  Pulse until integrated.
Whisk your egg and add into the food processor and pulse.

Remove the lentil mixture and form into 4 balls of equal size and press into 3/4 inch patties.
Heat up the remaining 3 tbsp of olive oil in a large pan and cook the patties for 8-10 minutes on each side.
Remove and place on a paper-towel lined plate to drain.
Serve with the sauce below, red onions slices, tomato, and a lettuce wrap or bun.  Increase your veggie factor even more by using several lettuce leaves as a wrap instead of just one.


Yogurt Sauce
~1 cup plain fat-free yogurt
2 tbsp fresh cilantro- chopped
1 tbsp fresh lemon juice
salt and pepper- a pinch or so of each

Whisk everything together, lather your burger with it.

Reheat leftovers in a preheated oven until warmed through.

Thursday, August 25, 2011

Caprese Zucchini

It seems crazy that just a few months ago I was squatting in the garden sprinkling seeds here and there.  It was even crazier when things started sprouting.  Now that everything is fully grown and producing goodies, I am going crazy with the amount of zucchini that I have piling up.

Mistake #1 was planting so much zucchini.  Mistake #2 was not having any recipes in mind for said zucchini.  I have tried a few recipes to use it up (zucchini cupcakes and zucchini fries), but I have been pretty disappointed with the results.  The zucchini pile continued to rise.

Then today I was flipping through Cooking Light at the store and came across a whole page devoted to zucchini variations.  I almost just jotted down the ingredients and steps, but of course there was a bunch of other recipes in the mag that I also wanted and were far too complex to simply write down or memorize.  This one could have been memorized, but oh well!

Alex hated this.  I really enjoyed it, especially compared to my previous zucchini flops.  I especially liked that I had to buy absolutely nothing, hooray for using up fresh produce and mozzarella cheese that is about to start stinking up the fridge!

Fresh, simple, quick.  Rating 8/10.  Alex would probably rate it a 0 to correspond with the absence of meat in this dish (and I also said earlier in the day that I was making pizza, then said that I didn't want to make dough, and he wasn't listening when I told him what I was making instead.  Not my fault!! :D)

Recipe adapted from Cooking Light
2 zucchini- cut into 1/2 inch slices (diagonal cuts make it fancy dancy)
1/4 tsp sea salt
1/4 ground pepper
2 tsp extra virgin olive oil

Caprese salsa
2 tomatoes- diced
3 tbsp fresh basil- chopped
fresh mozzarella (more is better! num num)
1 garlic clove- finely minced to increase health benefits!
1 tbsp extra virgin olive oil
1 tsp red wine vinegar

Combine the zucchini with the salt, pepper, and olive oil.
Preheat a grill pan over medium high heat and spread the zucchini out in a single layer.
Cook for two minutes and then flip and continue to cook for 2-4 minutes more (I liked mine to have prominent grill marks so I let them cook longer than the suggested 4 minute total time)

While the zucchini is cooking away prepare the salsa.
Dish out the zucchini and top with your caprese salsa.  Delicious.

Saturday, August 20, 2011

Dill Pickles

I love pickles.  So much so that the first thing that I did today at the Renaissance Festival today was throw a dollar at a wench and receive a pickle in return.  On my way out I almost bought another one, but then I realized that I already had a vat of pickles at home waiting for me.

I think that my love for pickles started because of my big sister.  Everything that she liked, I would like too.  That meant that I devoured enormous pickles like crazy when I was a kid, even though they were too sour for my taste buds.  My extended family also likes pickles, which is why I decided to take a shot at making my own for my grad party.  For the record, these were never served because I deemed them insufficiently aged by the time that my party rolled around.  However, the pickles are in their prime a week later.

The worst part of making pickles is dealing with the fresh dill.  I don't have any growing, so I had the option of going with dried dill or buying an enormous hunk of it from the grocery store.  I didn't know what to do with the hunk since I didn't want it to dry out, but I didn't want it to stank up my fridge either.  Anyway, aside from that making pickles is painless and relaxing in an old school way.

Make these pickles now.  Rating 10/10.

Recipe from Prevention RD

Supplies
2 1-quart mason jars (one for the brine and one for the pickles- or use just one jar and a glass that is a similar size)

Ingredients
4 pickling cucumbers- quartered into spears
8 sprigs of fresh dill
3 cloves of garlic- chopped
1 tbsp coriander seeds
1 tbsp white sugar
1 1/2 tbsp kosher salt
2/3 cup white vinegar
1 cup water

Begin by sticking as many cucumber spears as possible and the fresh dill in your mason jar.
Make the brine by mixing up the garlic, coriander, sugar, salt, and vinegar.  Shake vigorously until the salt and sugar have dissolved.
Pour the brine over the cucumber spears.  If some of the spears are still not submerged, fill with up to 1 cup of water until submerged.
Tightly screw on the lid and place in the fridge for at least 24 hours.  These babies improve drastically over time, so try not to inhale them all in one day.

I made these in bulk by making several batches with the above measurement of ingredients and then dumping them in a big stock pot.

Monday, August 8, 2011

Melon Smoothie

 If you like creamsicles and all things deceptively healthy, then you will for sure love this- it is like a  cantaloupsicle.  It is delightfully frothy, refreshing, and cleanses your palate.  Did I mention that it is healthy?

Rating 10/10

Ingredients
1/2 cantaloupe- chilled and cubed
1/2 honeydew- chilled and cubed
1/2 cup orange juice
1/8 tsp nutmeg
pinch of cinnamon
Juice of 1/2 lemon

Combine in blender
Serve immediately
Makes 2 servings

Suburban Kung Pao Chicken

Kung pao chicken was my favorite dish in China.  It was often the only thing that didn't have chicken heads or fungus mixed in with it.  Just kidding, almost.  Anyway, I have never ever made it before now but I had a serious hankering for some so I went to the store determined to come out with all of the fixings to make my beloved dish.

That was a huge failure of a shopping trip.  The grocery stores around here stink.  They think that an ethnic aisle should have soy sauce, rice, and tons of kosher food.  This doesn't work well for me, and it also doesn't help that in MN I can't check out the liquor dept on a Sunday to see if they have any rice wine there, since there is some outdated sabbath-inspired law that sends a lot of Minnesotan money over to Wisconsin.  Anyway, I made this recipe out of ingredients that anybody should be able to find in their adequately-stocked grocery store.

Rating 9/10


Ingredients


  • 1 lb chicken- chopped into 1 inch cubes

Marinade

  • 1 egg white- frothed
  • 1/8 cup dry white wine (I used up some leftover Riesling)
  • 1 tablespoon soy sauce
  • 1 1/2 tsp corn starch

Flavor makers

  • 1 tablespoon ginger- thinly sliced
  • 1 tablespoon garlic- thinly sliced
  • 8-10 dried chili peppers
  • 4 green onions- chopped into thin rings (reserve some of the green for garnishing the finished dish)
  • 4 teaspoons black bean sauce (this comes in a squat jar in the ethnic aisle by all of the soy sauces)

Sauce

  • 1/4 cup dry white wine
  • 2 tablespoons soy sauce
  • 1 tablespoon sesame seed oil
  • 1 tablespoon corn starch
  • 1 teaspoon white vinegar
Extras
  • roasted unsalted peanuts
Marinate the chicken for 30-60 minutes
Heat up a wok and place the chicken and its marinade in it- stir fry until chicken is cooked through
Once the chicken is thoroughly cooked add in the "flavor makers" and continue to stir fry for another minute
Pour the sauce into the wok and stir to coat the chicken and other ingredients
Top with peanuts and green onion garnish
Serve immediately, probably with some sticky rice!

Sunday, August 7, 2011

Buttermilk Pancakes

Due to our conflicting work/school schedules, Alex and I NEVER got to eat breakfast together.  I'm going to try to start up a Saturday morning breakfast tradition, starting with these delicious pancakes that I made with the byproduct of making butter the other day.  I used this recipe, which you can modify depending on how many people you are feeding.  Num!


Homemade Butter

Alex is home for a brief intermission from teacher bootcamp and I made him homemade butter to celebrate his return home (and the return of me eating square meals).  I think that I deserve best girlfriend award for this, or maybe the lamest person ever award since I made this on a Friday night.  Anyway, homemade butter is the way to go!

I made butter once in the 2nd grade during our Oregon Trail unit.  Ms. C had taped off an area in our classroom that was designated as a wagon, and we all scrambled to make sure that we had a "seat on the wagon" so that we didn't have to "walk" Westward.  That may have been my most favorite unit ever, and it didn't hurt that we made butter.

Way back in the olden days making butter was a big PITA.  You either had to churn it, or if you were a pioneer you could put the buttermilk in a pail and hang it off of the side of your wagon and let the bumps in the road churn your butter for you.  In the 2nd grade we made our butter by taking turns shaking a bucket.  I used a whisk attachment on my stand mixer to make my butter, then used my blender to wash it.  I would recommend just using a food processor to do this (not a mini chopper!), but you will have a lot more hard-to-clean dishes piling up in your sink.  Rating 100/10.

Ingredients
Heavy whipping cream

  • Place your heavy whipping cream in a stand mixer or food processor and whip/pulse for about 10 minutes, or until your butter has obviously separated from the buttermilk.  It will be yellow and float to the top (or be stuck inside of your whisk).
  • Strain the buttermilk and use a spoon to squish out any remaining liquid.  Reserve buttermilk for pancakes!
  • Throw a cup of ice cold water into the butter and beat for 30 seconds, repeat the draining process, but this time discard the liquid.
  • Pack in a covered jar and use within 14 days.  This shouldn't be hard.

Thai Pizza

I love pizza.  My problem is that I like gourmet pizza, and you can't find any of that around here with a reasonable price tag.  When Alex and I were in Iowa for a weekend we ate at a pizza place and I ordered this pizza without looking at the price.  Ooops.  I think that I paid $17 for a thin crust medium sized pizza.

I assembled this pizza for way under $10, and it could easily feed 3 people.  Oh, and it is better than the one from the restaurant.  No good photos because I inhaled it.  Rating 8/10.


Ingredients
Your favorite pizza dough (I used this one)
Peanut sauce- find it in your ethnic aisle
Chicken- cooked and cubed
1 red pepper- diced
broccoli florets
tomatoes- chopped (optional)
green onions- chopped (reserve some of the green bit for garnish)
cilantro
shredded mozz cheese

Prepare your dough ahead of time!
Preheat oven to 500 degrees with a pizza stone placed inside
Roll out dough to desired size and place on a pizza peel that has been generously sprinkled with corn meal
Spread out a layer of peanut sauce (not too much, not too little)
Top with chicken, red pepper, broccoli, tomatoes, and green onions
Bake until crust is golden (this varies on how thick your crust is and how accurate your oven's heating is so start keeping an eye on it at around 8 minutes).
Remove from oven and top with cheese, remaining green onions, and cilantro
Serve immediately

Wednesday, August 3, 2011

Mango Tango

Alex is off at a teacher bootcamp.  When Al is gone, so is my ambition to make legitimate meals.  One of the great things about this situation is that my dish pile is significantly smaller than usual.  !  Anyway, this is a super groovy smoothie.  I had one of Odwalla's Mango Tangos the other day and meant to recreate it.  I have since then lost the bottle and had to improvise with the ingredients, but it was still delish.  I don't have anything else to say about it.  Fatigue does that to you.  Lesson learned- don't take a three hour nap until 7 pm and then try to go to sleep at 10 pm.

Oh and a work related update- I've been doing nothing but working at homes that are on lakes.  This = lots of great lunch time views and breezes.  I wish that I could pack this to bring to lunch tomorrow!

Rating 9/10.


Ingredients
1 mango
1 banana
1/4 cup coconut milk (I used the kind that comes in a carton, not a can)
1/4 cup apple juice
1/4 cup orange juice
1 hearty squeeze of lime
4 ice cubes

Blend all ingredients together and serve immediately!
Serves 1-2

Monday, August 1, 2011

Krista's Summer Salad

I am forcing us to eat more salads in an effort to get back to my former shape that I abandoned when I stopped working out for a month straight when I moved home/lost access to a TV to watch my workout videos on.  I do have my TV back now and all of my glorious tapes as well, but I need to make my diet even healthier to balance out this extra pudge going on (somehow there is a indirect correlation to my access to TV and my access to ice cream).

Enter the delicious salad.  I love anything with fruit, and greens are no exception.  Add pretty much any berry that is on sale and you have a salad that you won't have a problem finishing.  The cinnamon roasted pear slices are great on their own, but if you don't want to run your oven then raw pear slices will work just as well.  Rating 8/10.


1 head of lettuce- chopped
1 handful of asparagus- chopped into 2-inch segments and blanched (placed in boiling water for 2 minutes and then drained)
1/3 cup walnuts
3/4 cup blueberries
3/4 cup raspberries
1 yellow tomato- sliced
1 red tomato- sliced

1 pear- skinned and sliced into 1-inch chunks *see baking preparation below
ground cinnamon

raspberry salad dressing to taste

Preheat oven to 375
Place pear slices in an ovenproof dish and dust with a generous dose of cinnamon.
Bake the pears for 10 minutes, stirring occasionally.

Combine all ingredients and serve immediately
Makes 2 servings.

Tuesday, June 14, 2011

I am back in MN!
When I am not up north demolishing a cabin and trying to convince myself to hop in a kayak I am:

Working on the finishing touches on the headboard that I have reupholstered

Watering a few of these


Filling the pond up with water for the enjoyment of the frogs


And planting kisses on this handsome mug